· 6 min read
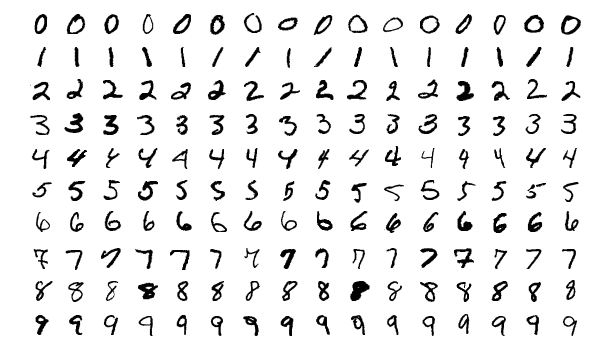
Digit Recognition
MNIST: Kaggle Getting Started
How to read this?
-
Skim through the Pre-requisites
-
Open each commit notebook then read the explanations.
-
Just run each notebook top to bottom.
-
Try to understand each line.
-
If you find yourself stuck at statements, explore the variable involved.
-
Still, stuck?? highlight the explanation and comment. I will get back to your query.
Commit Version 2: Getting Input and Generating Submission File
-
Day 1
-
Score — 0.43
-
Time invested — about an hour
My goal for any first commit is always to get input, pass it through a NN and generate a submittable output.
Read the data
train_df = pd.read_csv('/kaggle/input/digit-recognizer/train.csv')Training/testing
I needed a way to separate features and labels.
So the easiest way was to not select a column named ‘label’.
test_df does not contain a label column
train_df.loc[:, train_df.columns != 'label']
type(test_df.get('label')) == None
#false
Dataset
Returns features and labels if ‘train=True’. else it returns just features
class MnistDataset(Dataset):
    def __init__(self, df, train=True):
        #convert df to self.X and self.y using above

    def __len__(self):
        return self.X.shape[0]

    def __getitem__(self, i):
        if self.train: return self.X[i], self.y[i]
        return self.X[i]
Observation: Even if I don’t explicitly mention Tensor, NumPy is converted to tensor.
Creating DataLoader
bs = 64
ds = MnistDataset(train_df)
dl = DataLoader(ds, bs)
Checking if DataLoader returns the right output
images, labels = next(iter(dl))
images.shape, labels.shape
Creating a vanilla Neural Network
I created a dumb NN just so that I can pass data through it and get output in the desired shape.
The details don’t matter much. This will be replaced by a CNN later.
Preparing the training loop
epochs = 10
loss_fn = nn.CrossEntropyLoss()

import torch.optim as optim
o = optim.Adam(net.parameters())
Creating the training loop
Here are the 4 steps to create a basic training loop
- Loop epoch number of times
for i in range(epochs):
...- Inside the epoch loop, loop through data loader (dl)
for images, labels in dl:
...- Inside the data loader loop,
-
zero grad optimizer before passing pushing data into NN.
-
Take an optimizer step after pushing data through NN.
o.zero_grad()
...
o.step()- Between optimizer zero_grad and optimizer step, pass data through the NN, compute loss and gradients.
out = net(images.float())
loss = loss_fn(out.float(), labels.long())
loss.backward()
Generating output
A similar step as above has been taken to generate test_dl and the testing loop.
The only difference,
-
test_dl has ‘train=true’. Dataset will only return features and not labels.
-
code to not calculate gradients since we are not training.
with torch.no_grad():
...-
The output is in the form of numbers from 0…9.
-
Our output is a column (dim=1) array of length 10 with probability.
-
The maximum of this array is our output.
out.argmax(dim=1)We store these outputs in an outputs python list.
test_df.shape, sample_df.shape
# Out[17]: ((28000, 784), (28000, 2))-
I realized that sample submission and output df have the same length.
-
I just need to add ‘Label’ column to the submission data frame and save it in CSV form.
sample_df['Label'] = outputs
sample_df.to_csv('submission.csv', index=False)
index=False removed the default pandas index when saving
Commit Version 3: Improvements
Changes: Proper Accuracy, Graph, and Data Normalization
-
Day 4
-
Score — 0.96
-
Time invested — about an hour
Proper Accuracy
Accuracy should always be calculated on the validation set.
Creating a separate validation set
val_len = int(len(ds)*0.01) # 0.01 percent of data
train_len = len(ds) — val_len # all other are in training

from torch.utils.data import random_split

train_ds, val_ds = random_split(ds, [train_len, val_len])
Likewise, 2 data loaders are created.
bs = 64
train_dl = DataLoader(train_ds, bs)
val_dl = DataLoader(val_ds, bs)
Changes in the training loop
A separate list called accuracies in created to store the accuracy of an epoch.
...
with torch.no_grad():
        accuracy = 0
        for images, labels in val_dl:
            out = net(images.float())
            accuracy+=(out.argmax(dim=1) == labels).sum().item()
        accuracies.append(accuracy/len(val_ds) * 100)
Graph
Since the accuracy of each epoch was stored in a separate accuracies list, creating a graph was easy.
import matplotlib.pyplot as plt

plt.plot(range(epochs), accuracies)
Data Normalization
After plotting the graph, I realized accuracy was 43% which is the same as the score of commit 2.
The easiest thing to do was to normalize the data.
Since MNIST images are in the range of 1…250 the easiest thing to do was to divide by 250 which would result in a range of 0…1.
Ideally, the range should be around 0 so an even better approach would be
image = image/250–0.5this would result in a range between -0.5…+0.5.
Later we would use torchvision.transforms.Normalize(mean, std, inplace=False) which generates unique normalization value for each dataset
Commit 6: ConvNet, and GPU
-
Day 6
-
Score — 0.97
-
Time invested — about 2 hours (lots of googling and reading docs) + 1 hours fixes bugs
ConvNet
Convolutional Neural Networks are ideal images.
ResNet
ResNet 34 is my goto ConvNet but since MNIST is so easy, I went with ResNet 18.
import torchvision.models as models
resnet18 = models.resnet18(pretrained=True)
resnet18.fc #print fully connected network
ResNet is designed to output 1000 classes. But our output is from 0…9 aka 10 classes.
lin_in = resnet18.fc.in_features

import torch.nn as nn

resnet18.fc = nn.Sequential(
    nn.Linear(lin_in, 10),
    nn.Softmax(dim=1)
)
Convert Grayscale to RGB image
ResNet expects RGB images. MNIST is grayscale.
img = img.view(3, 28, 28).expand(3, 28, 28)`This grayscale to the RGB line is added to our Dataset class.
Normalization
When using an existing model, we need to use the same normalization values as that model. The docs mention the normalization value.
import  torchvision.transforms as transforms
normalize = transforms.Normalize(mean=[0.485, 0.456, 0.406],
                                 std=[0.229, 0.224, 0.225])
The init and getitem dataset class have been modified to use this transformation.
Modifications have also been made to test_ds.
GPU
One I started the training loop, I realized it suddenly became too slow.
GPU is needed!
device = torch.device('cuda:0') if torch.cuda.is_available() else 'cpu'If the GPU is on, the device will be cuda.
The neural network and the data in training, validation and texting loop have been changed to run on GPU.
net = net.to(device)
...

images, labels = images.to(device,dtype=torch.float), labels.to(device)
And since we are on GPU we can increase our batch size from 64 to much higher.
I experimented with a few sizes from 320…640 and kept an eye on GPU utilization and settled for 512.

I did the same for num_worker which specifies the number of threads to load a batch. This is CPU stuff.
Along with monitoring GPU and CPU usage, I modified training_loop to show the amount of time taken to complete each epoch.
bs = 512
num_workers = 2
train_dl = DataLoader(train_ds, bs, num_workers=num_workers)
val_dl = DataLoader(val_ds, bs, num_workers=num_workers)
This resulted in 7 seconds per epoch.
For testing, the batch_size can be much higher since we don’t have to back prop.
Commit 7: Improvement
-
Day 8
-
Score — 0.97
-
Time invested — about 30 minutes
I learned that you don’t need nn.Softmax if you are using nn.CrossEntropyLoss.
nn.CrossEntropyLoss has nn.Softmax built-in and the results of softmax are not used during back-prop. So it can be safely removed.
Now FC is this:
lin_in = resnet18.fc.in_features

import torch.nn as nn

resnet18.fc = nn.Sequential(
    nn.Linear(lin_in, 10)
)
Index: [Series - Kaggle Getting Started]({{ site.baseurl }}/deep%20learning/kaggle/2020/03/30/series-kaggle-getting-started.html)
Next Post: []