· 4 min read
10 Google Collab Tips
Placeholder
Collab is my favorite place to do deep learning because:
-
No setup needed
-
Free
-
Faster than typical local setup
-
It is better than Kaggle and easier than Google Cloud.
-
Really good editor features.
Similar: Code better in Jupyter Notebook
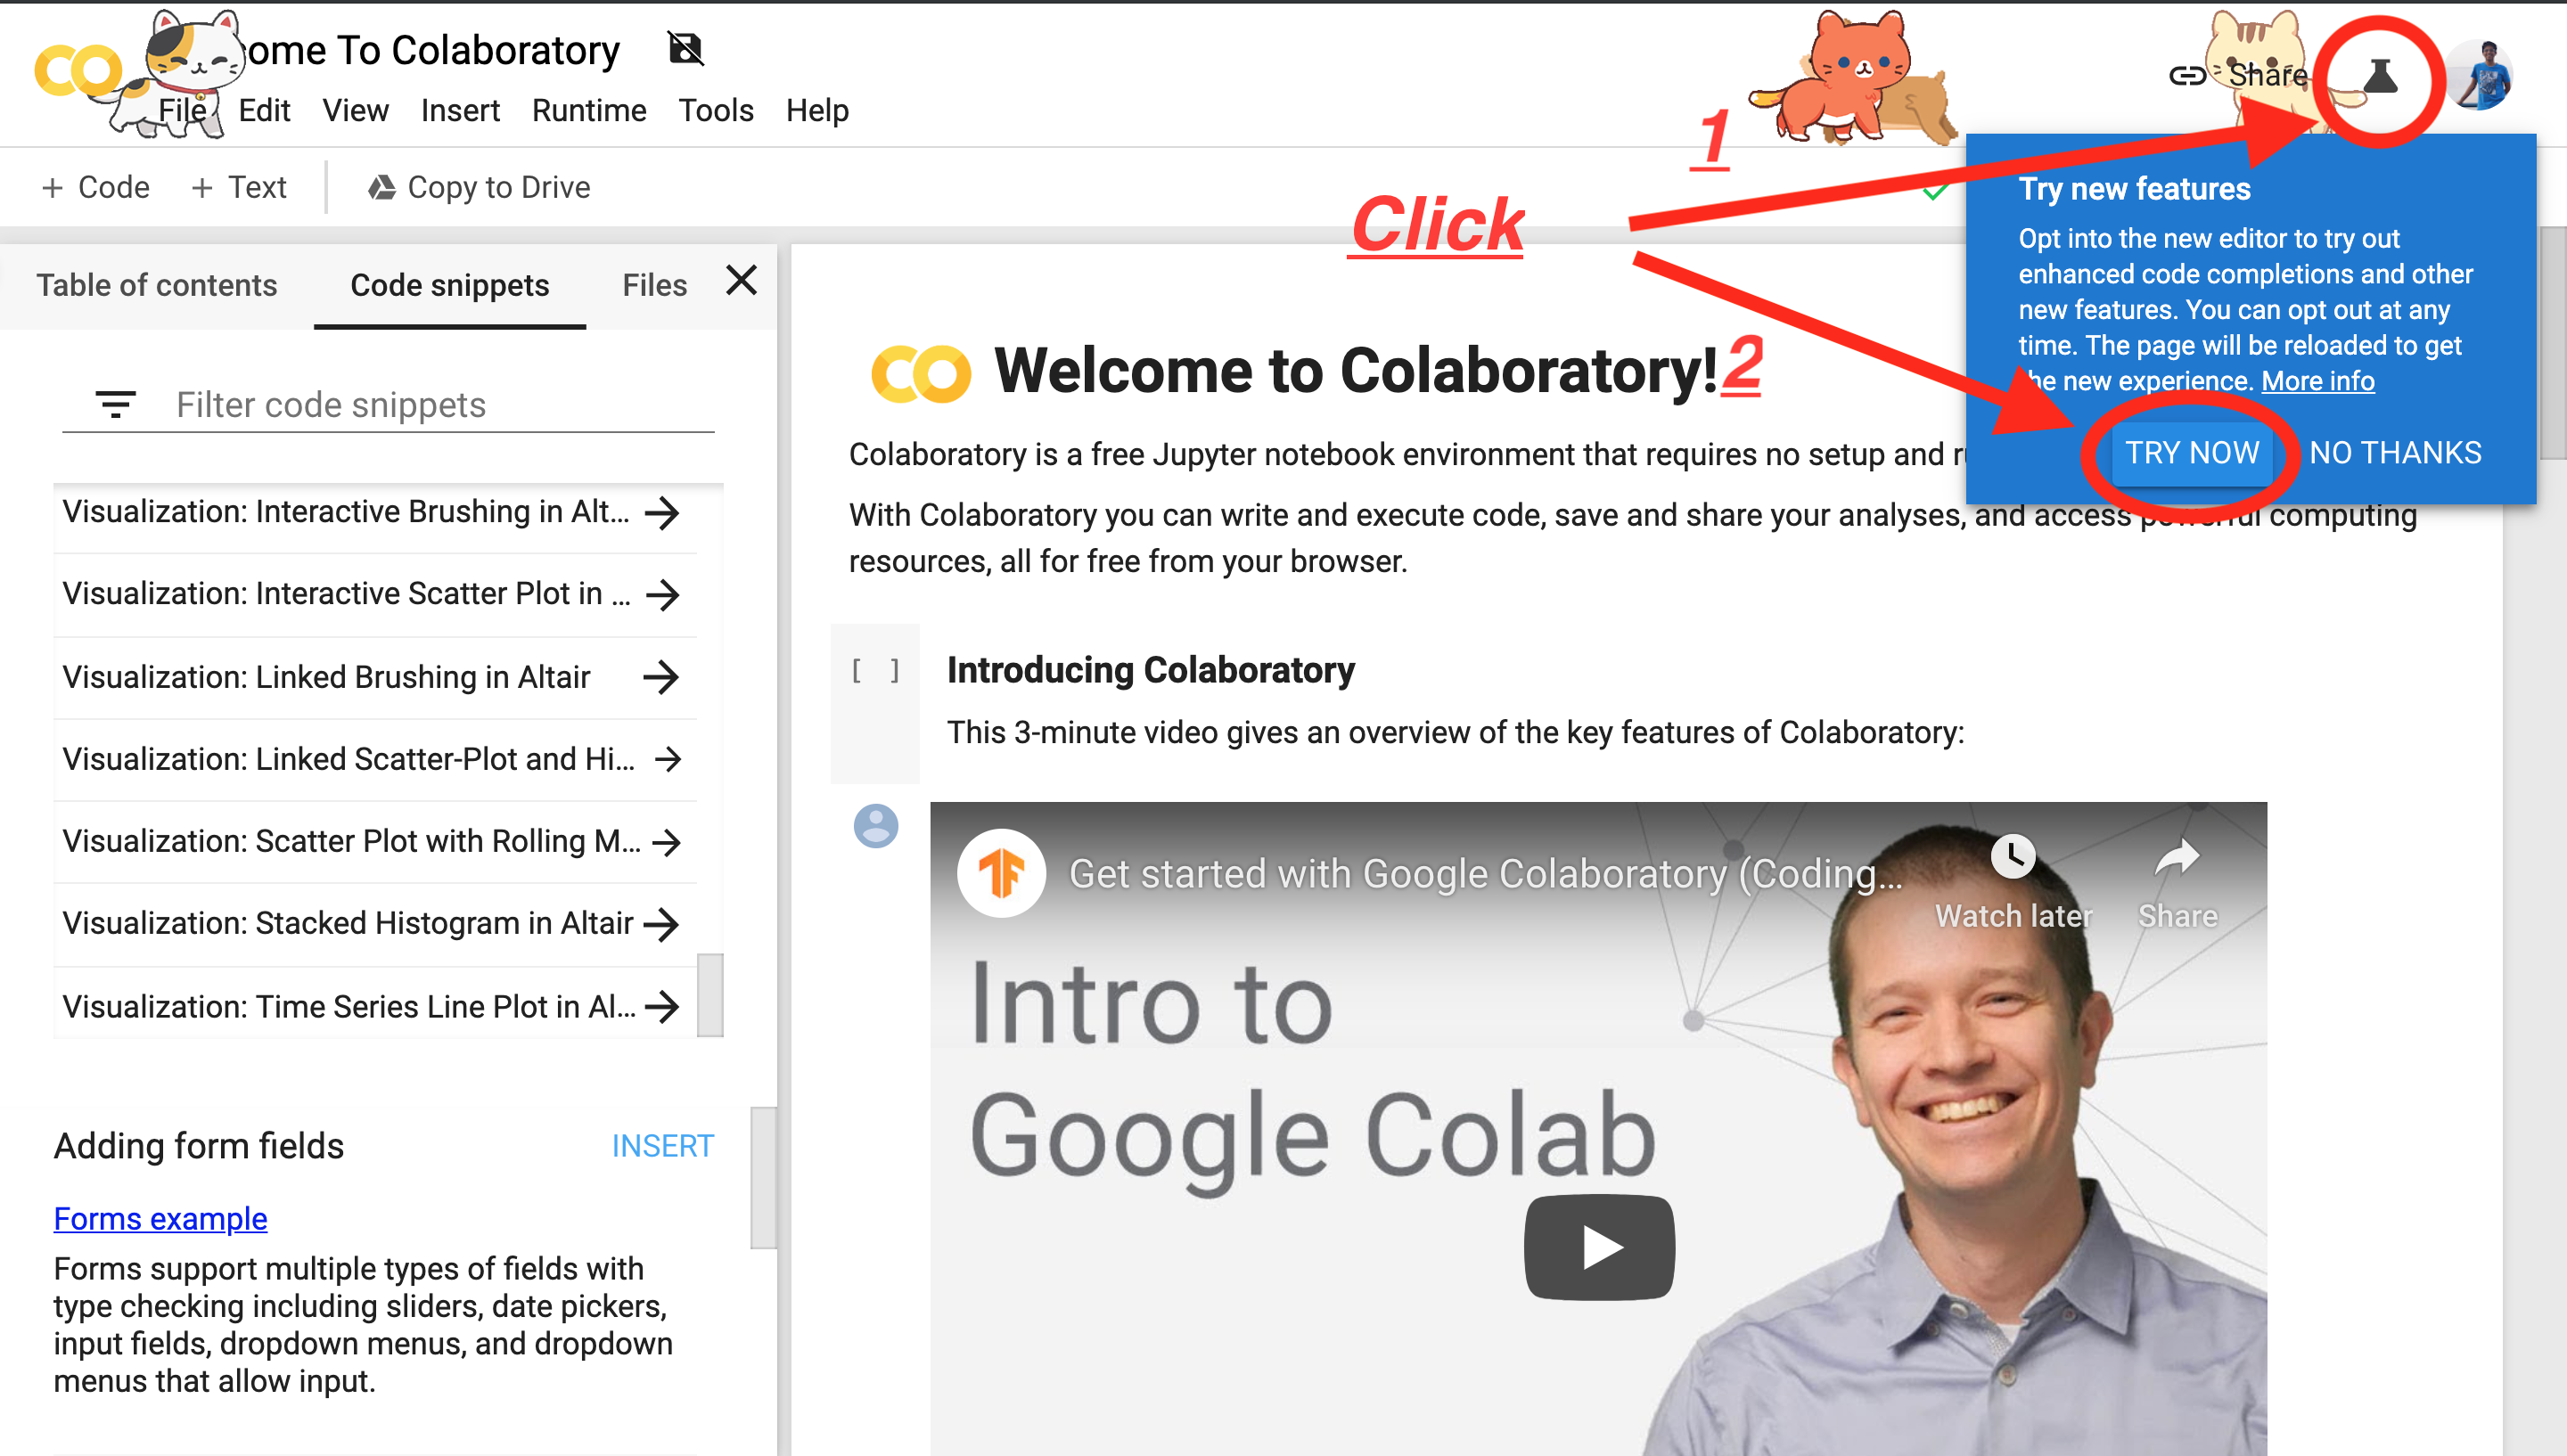
1. Always Turn On Experimental Feature
Dynamically typed languages like Python are a pain (for me) because they do not provide good auto-complete. This is the best one I have seen so far.
2. ️ Jump to Definition
3. Use GUI for exploring files and Mounting Google Drive
Deep Learning is intimating enough.
You don’t want to remember everything as code. Use the GUI.
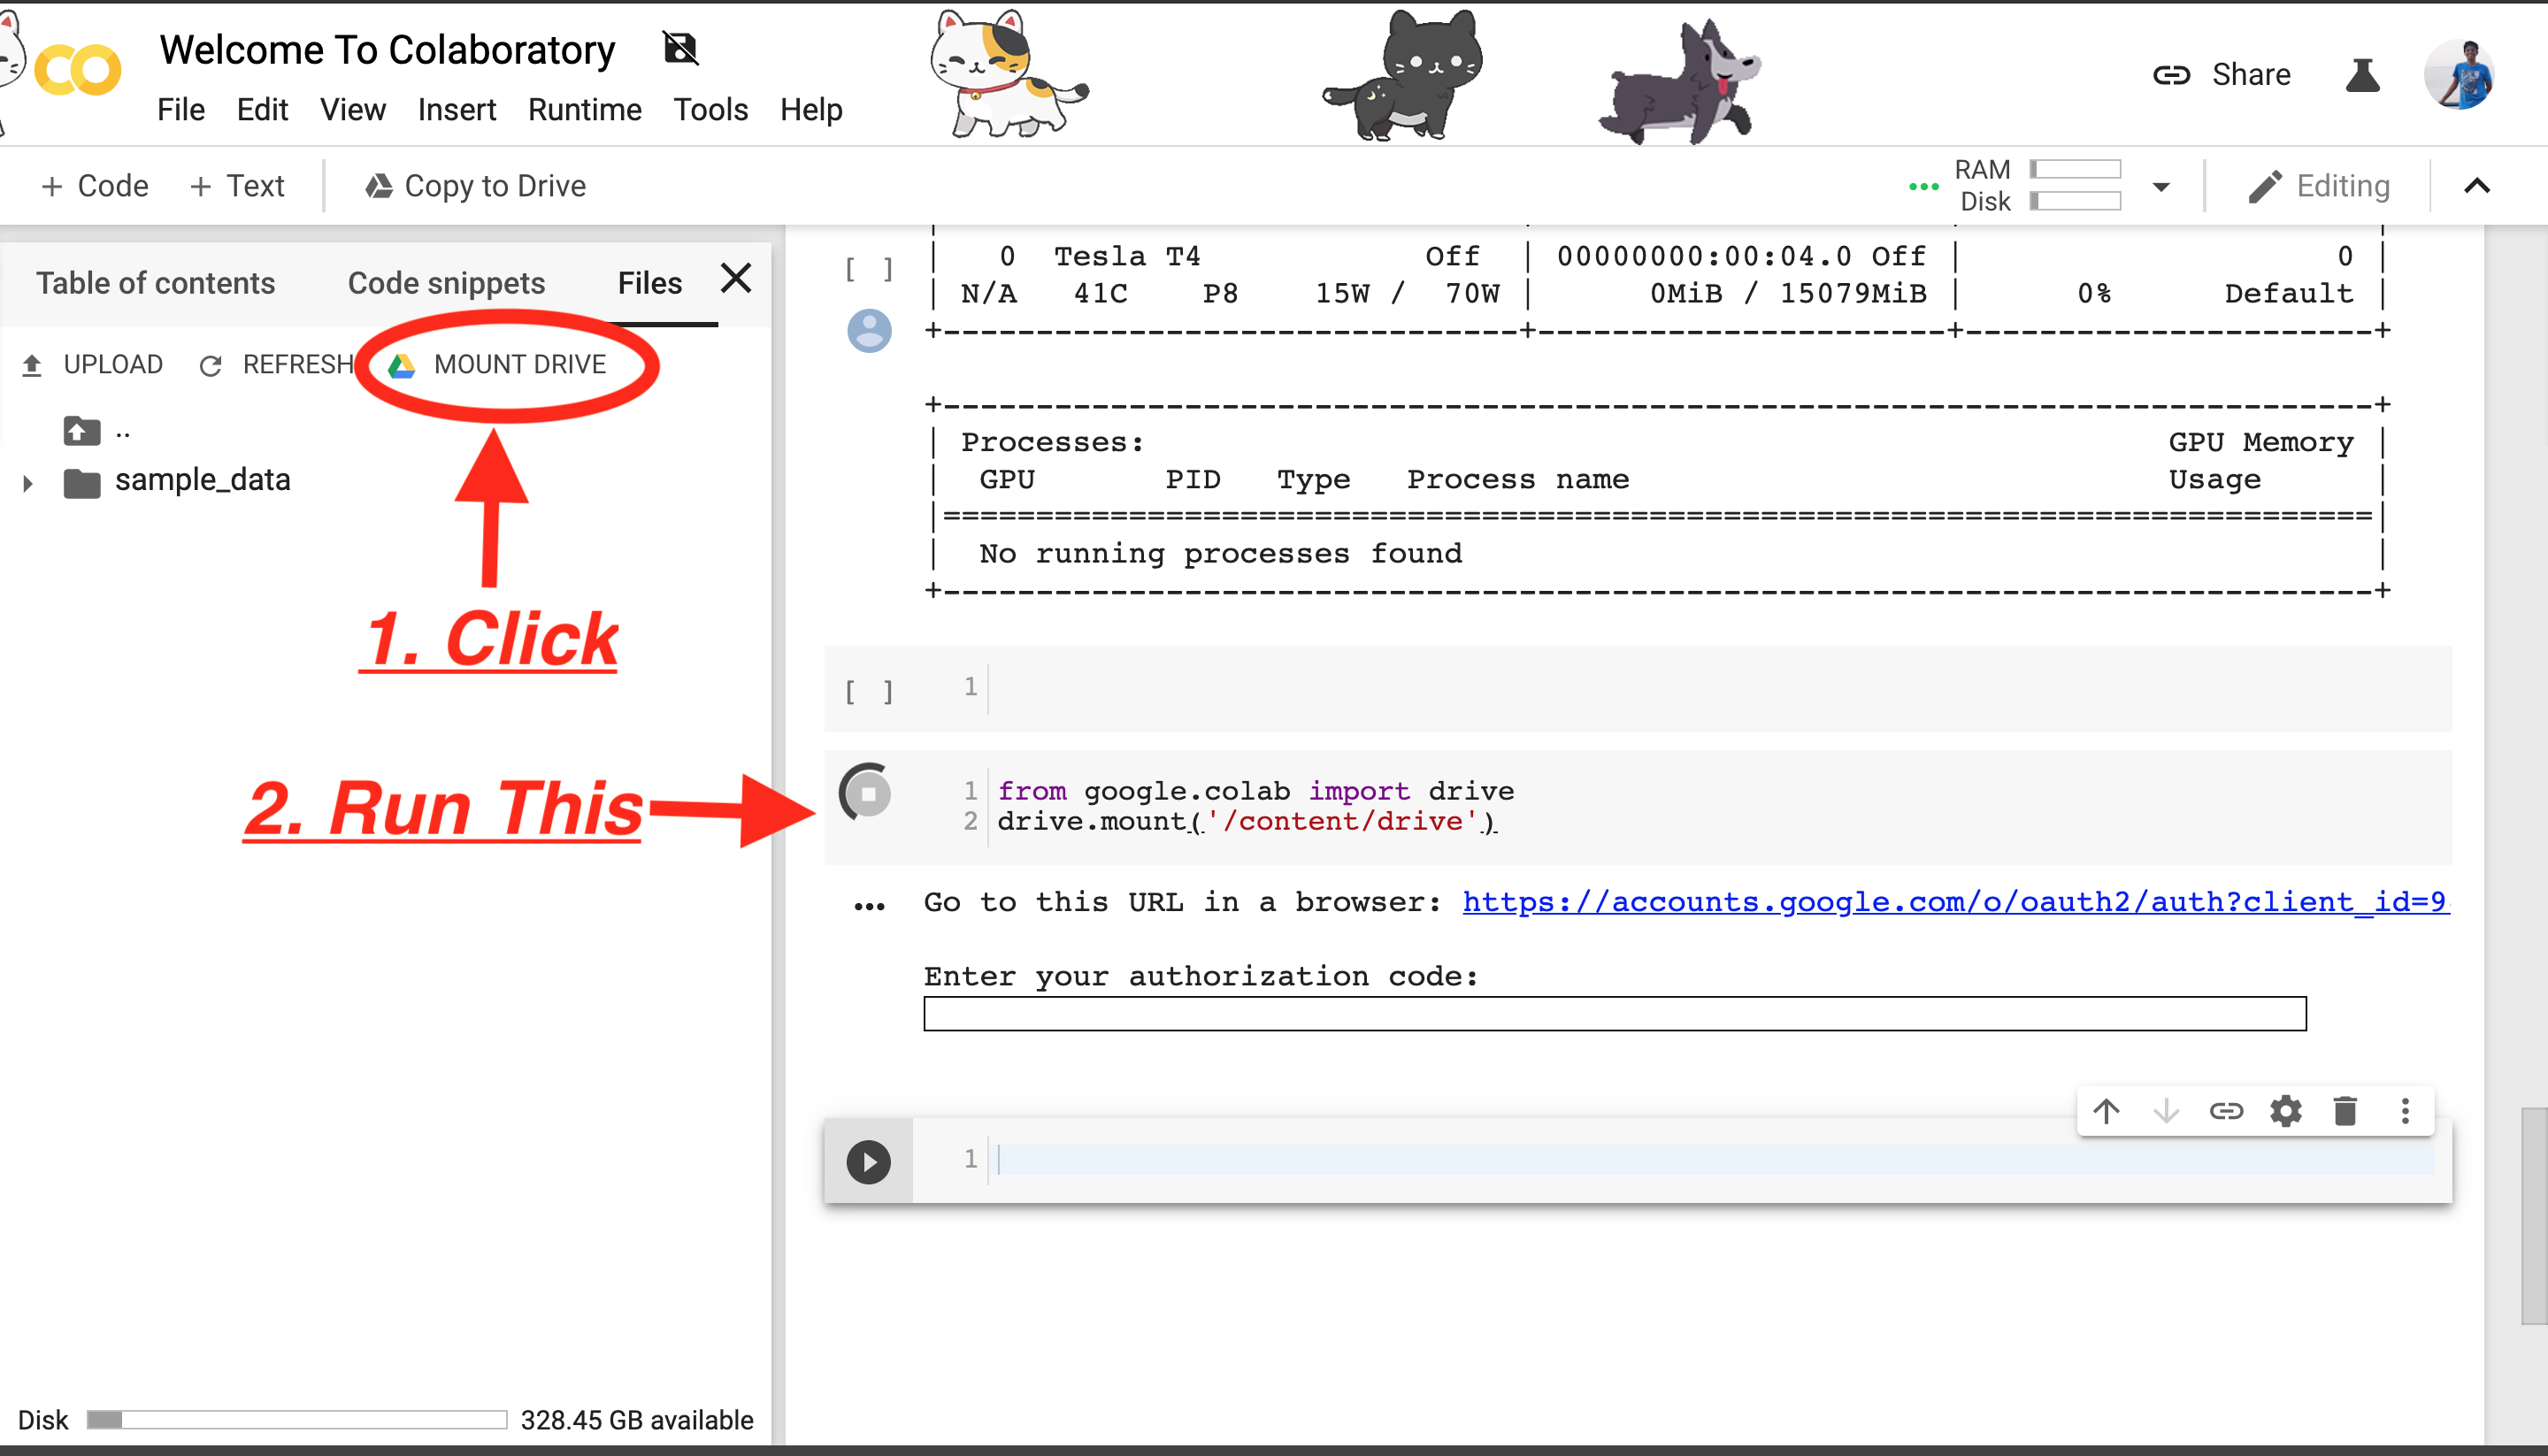
If a certain file you are looking for you can explore right click and click on copy path.
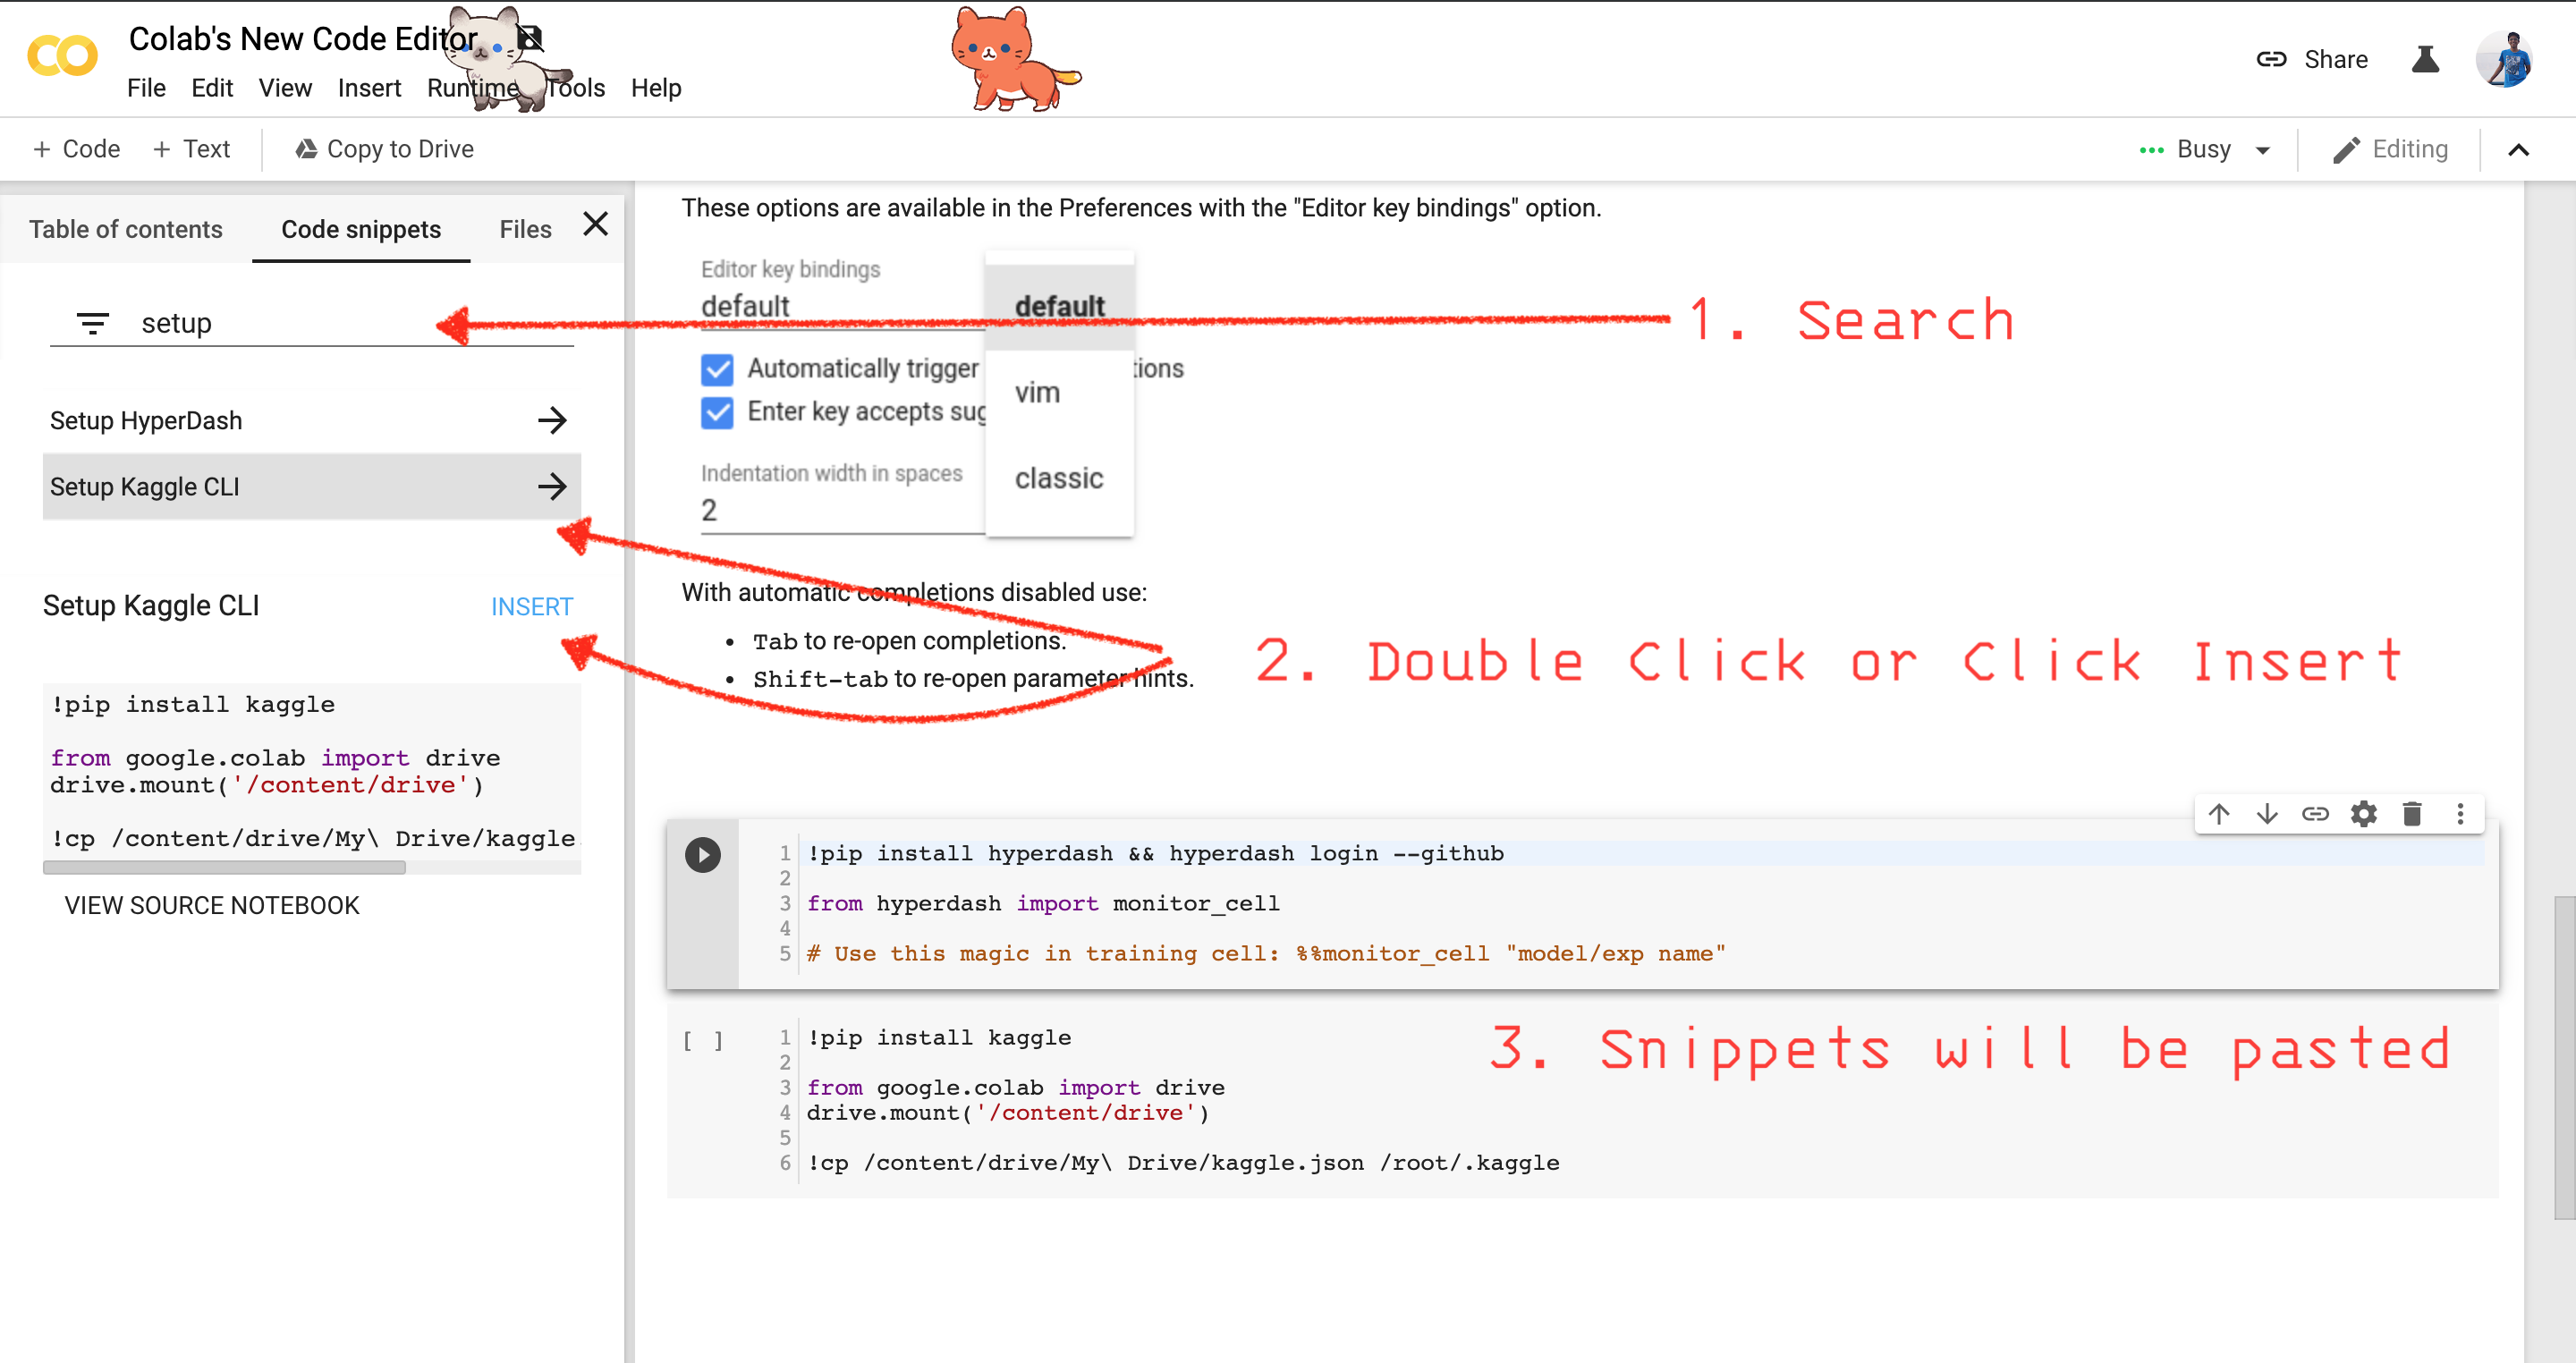
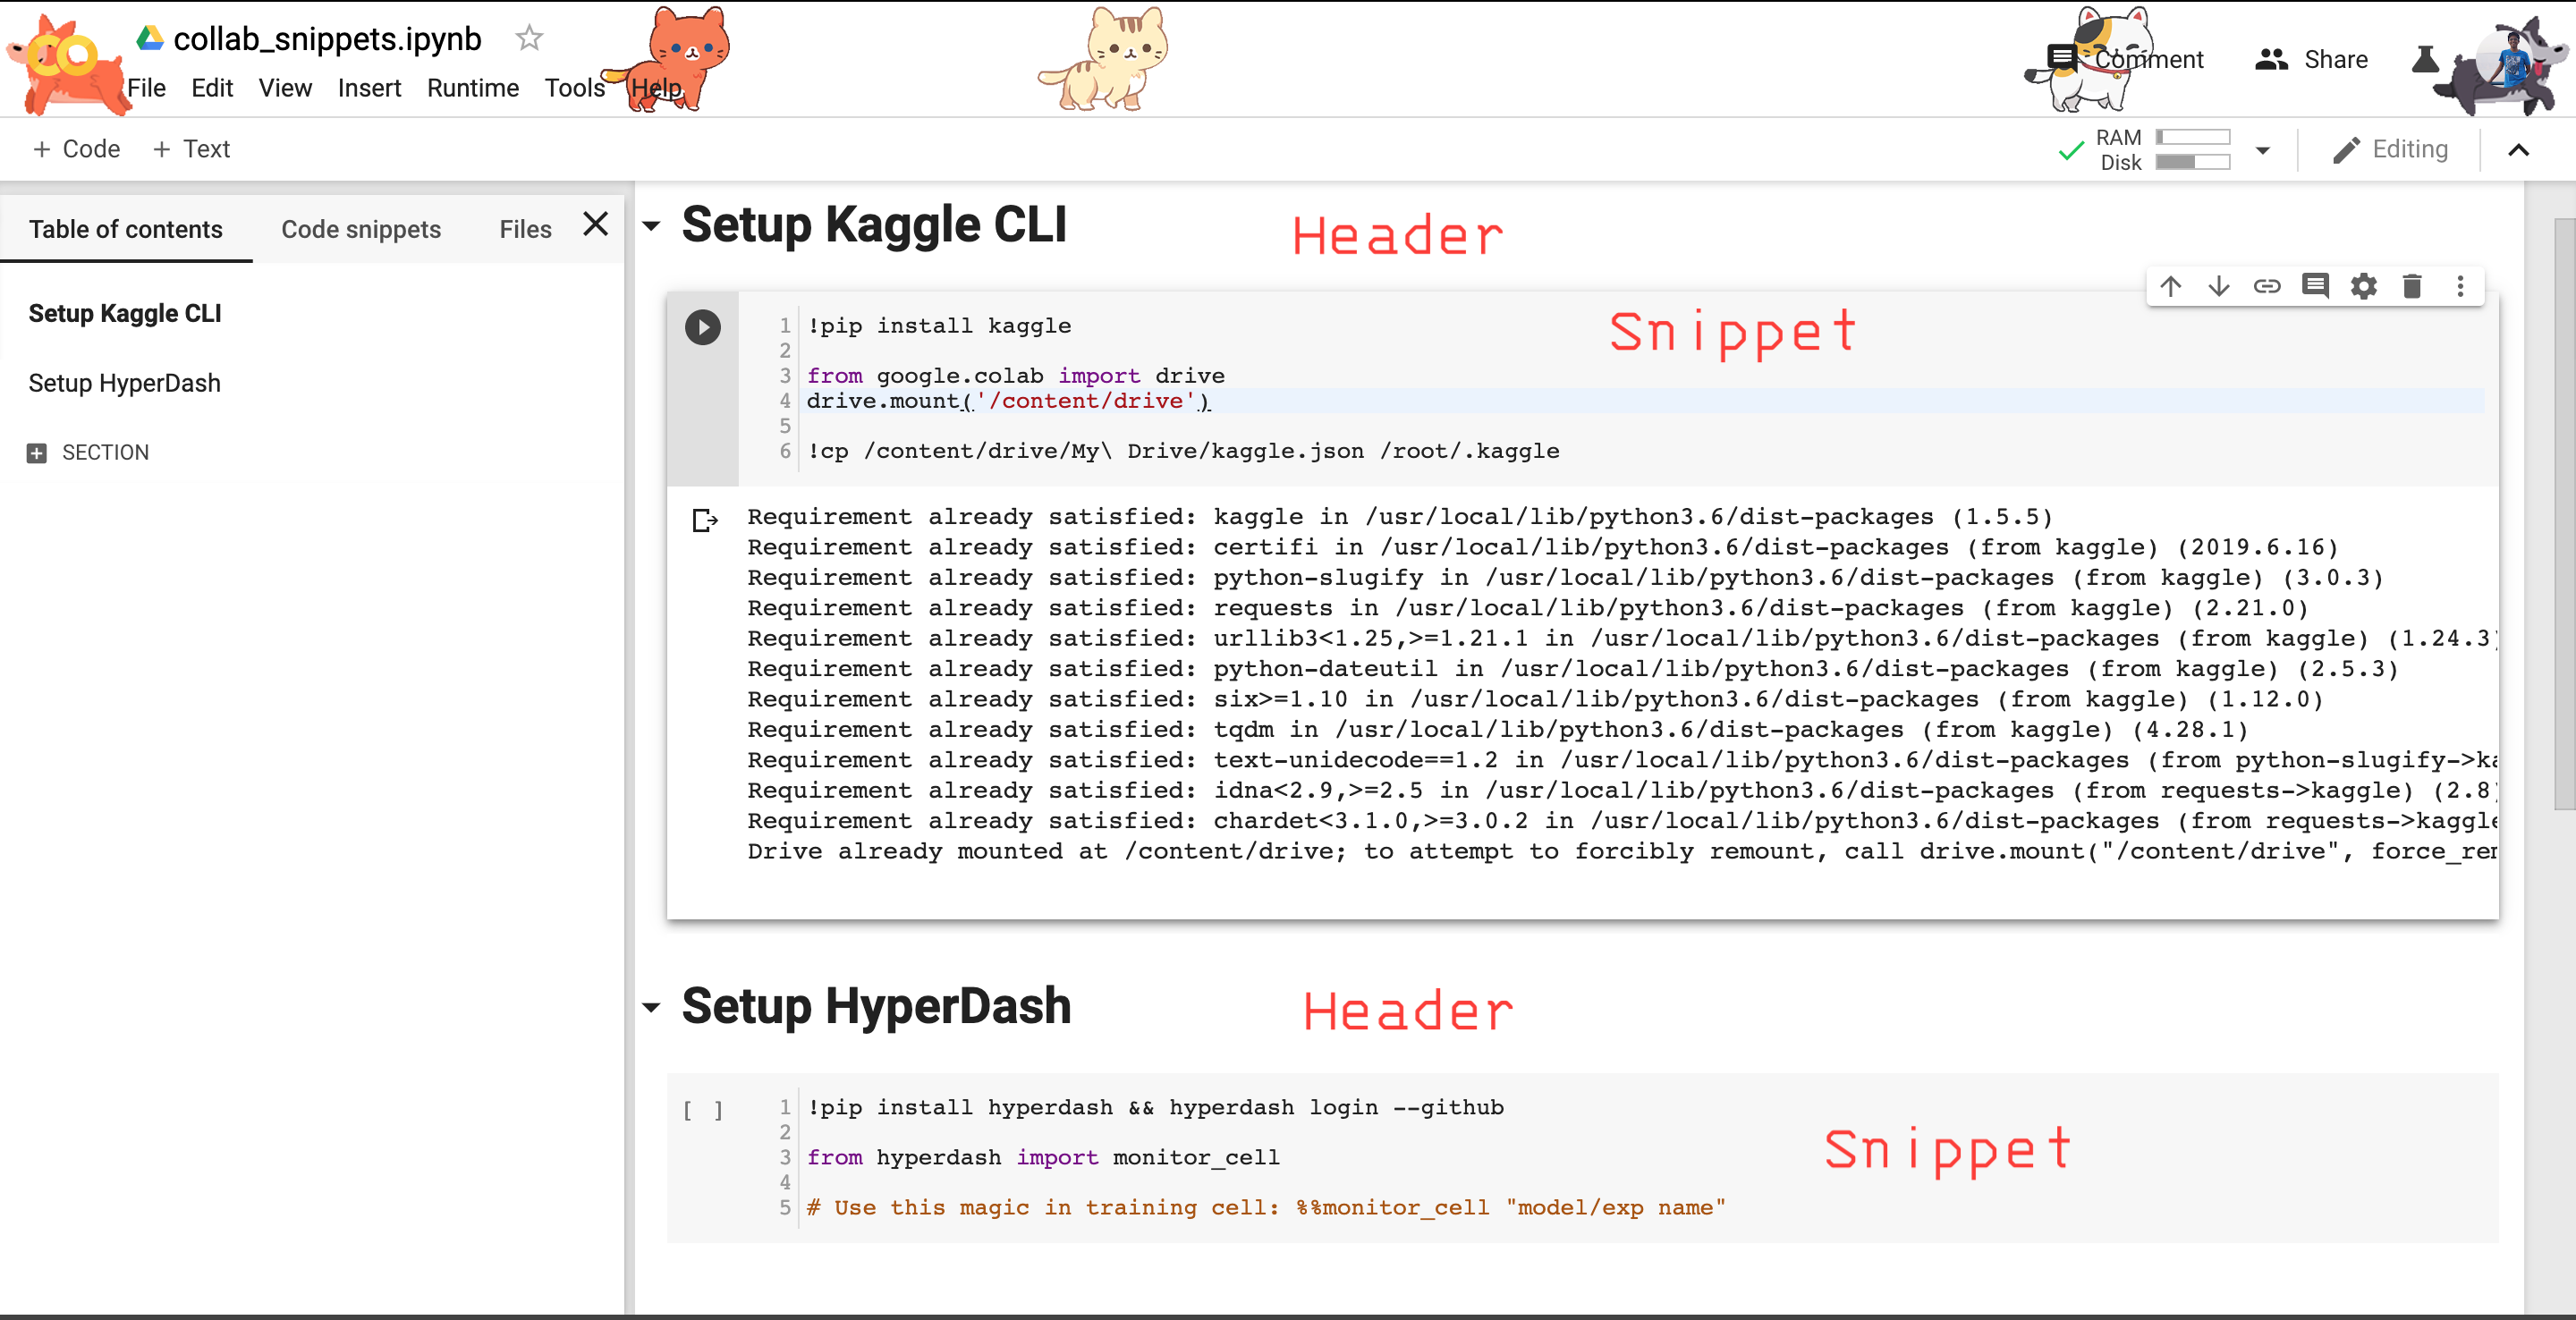
4. Creating Custom Snippets
You can add custom snippets by:
- Creating a collab notebook with a header followed by a snippet
- Including it in your other notebooks by going to Tools -> Preferences and pasting URL of the custom notebook.
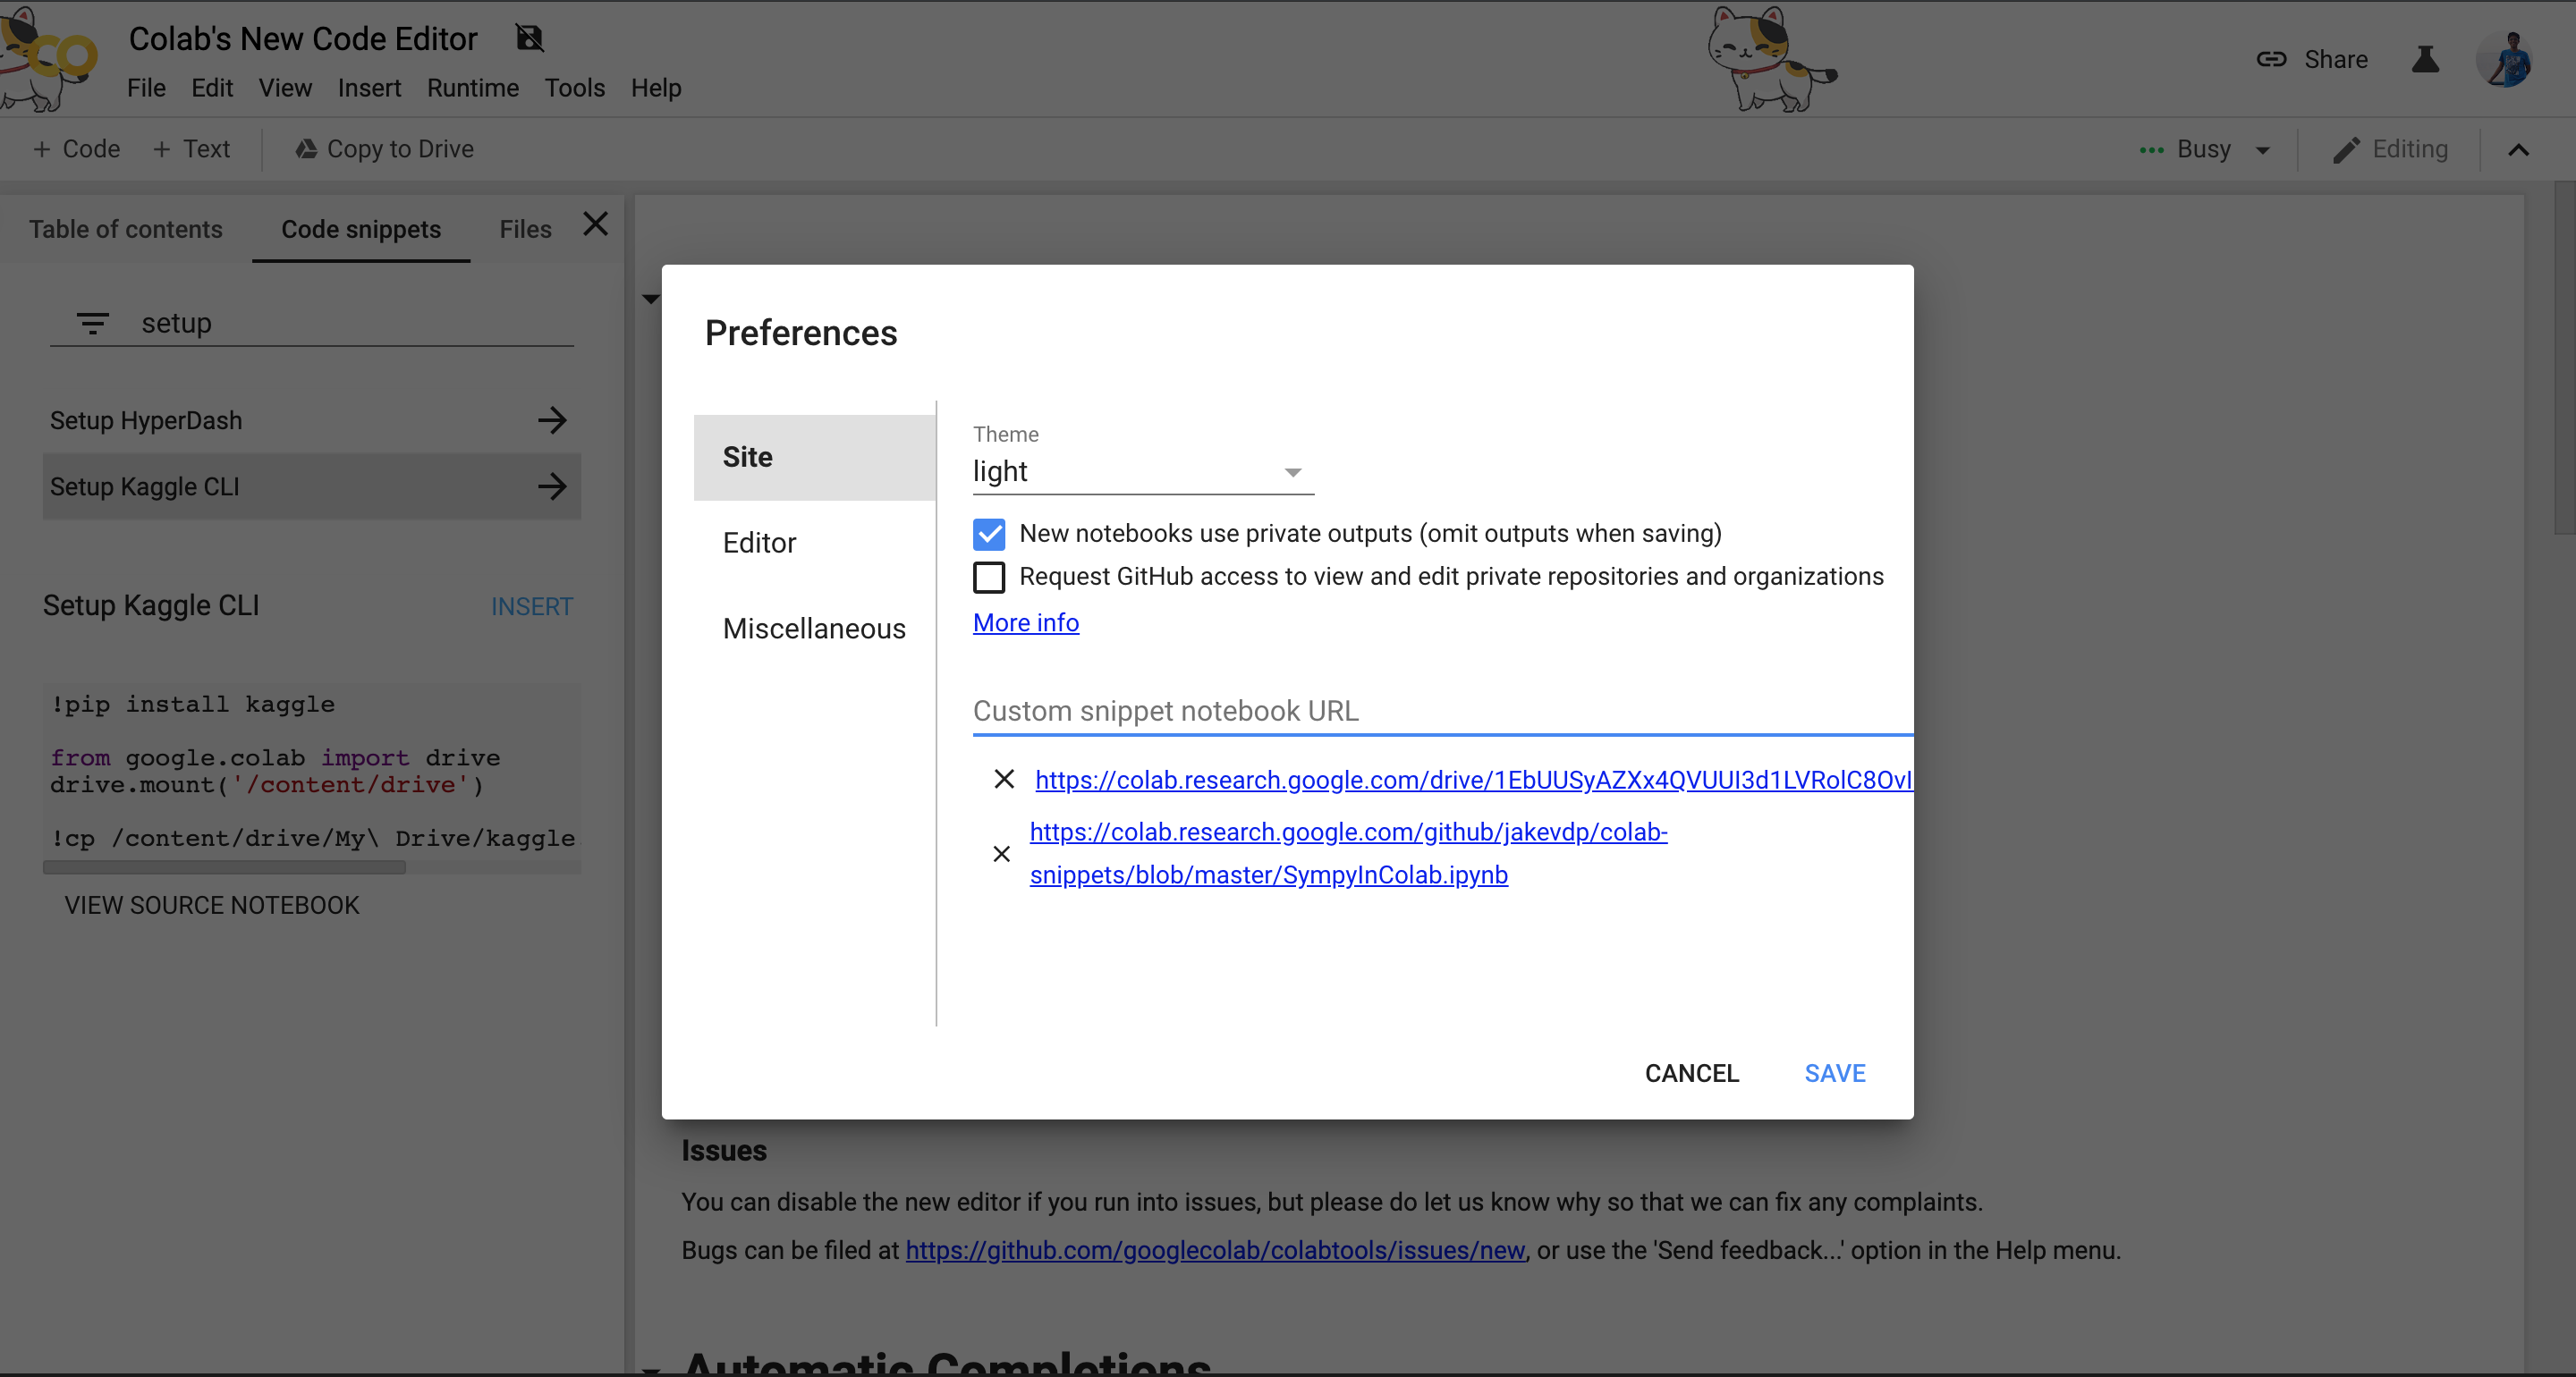
- Search and use your snippet in code snippet section on the left
5. Get GPU Info
Type:
!nvidia-smiIf you have GPU mounted you will get this reply.
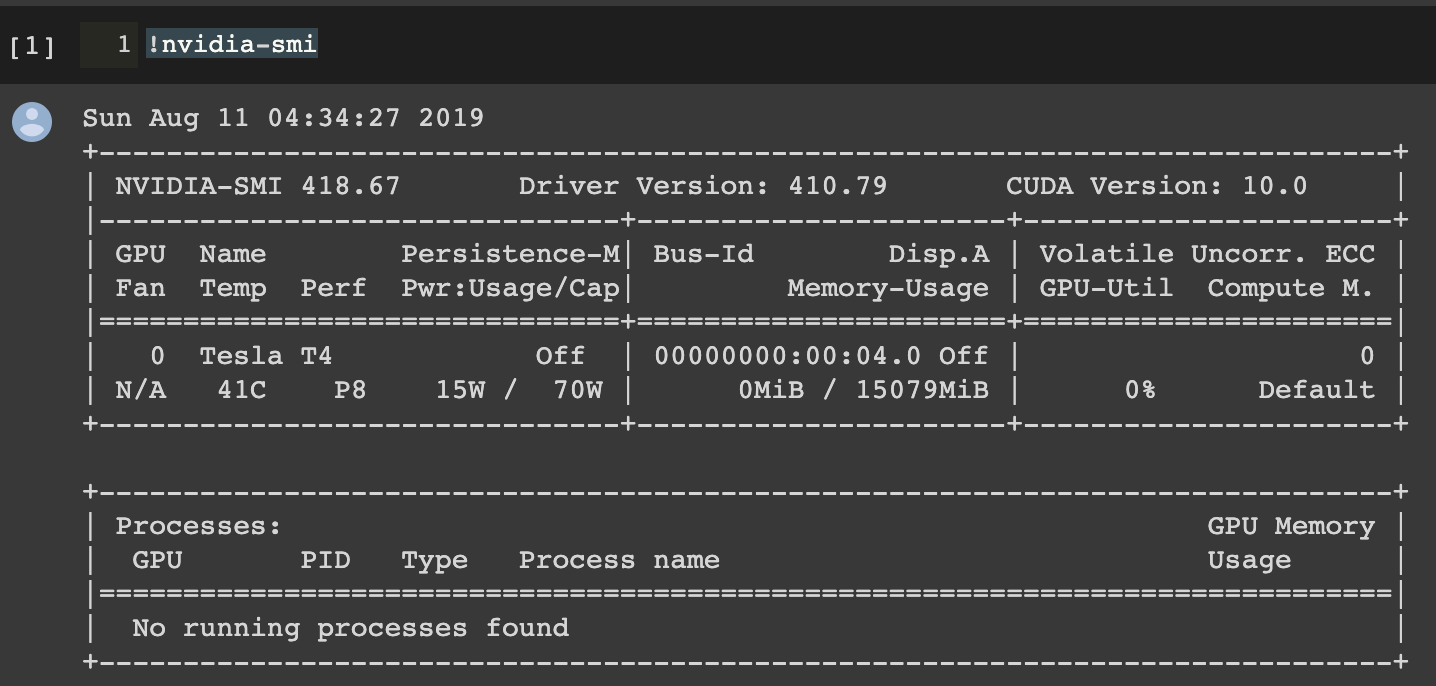
In case if you don’t know how to mount GPU:
Click RunTime Menu → Change RunTime→ Hardware Accelerator → Choose GPU
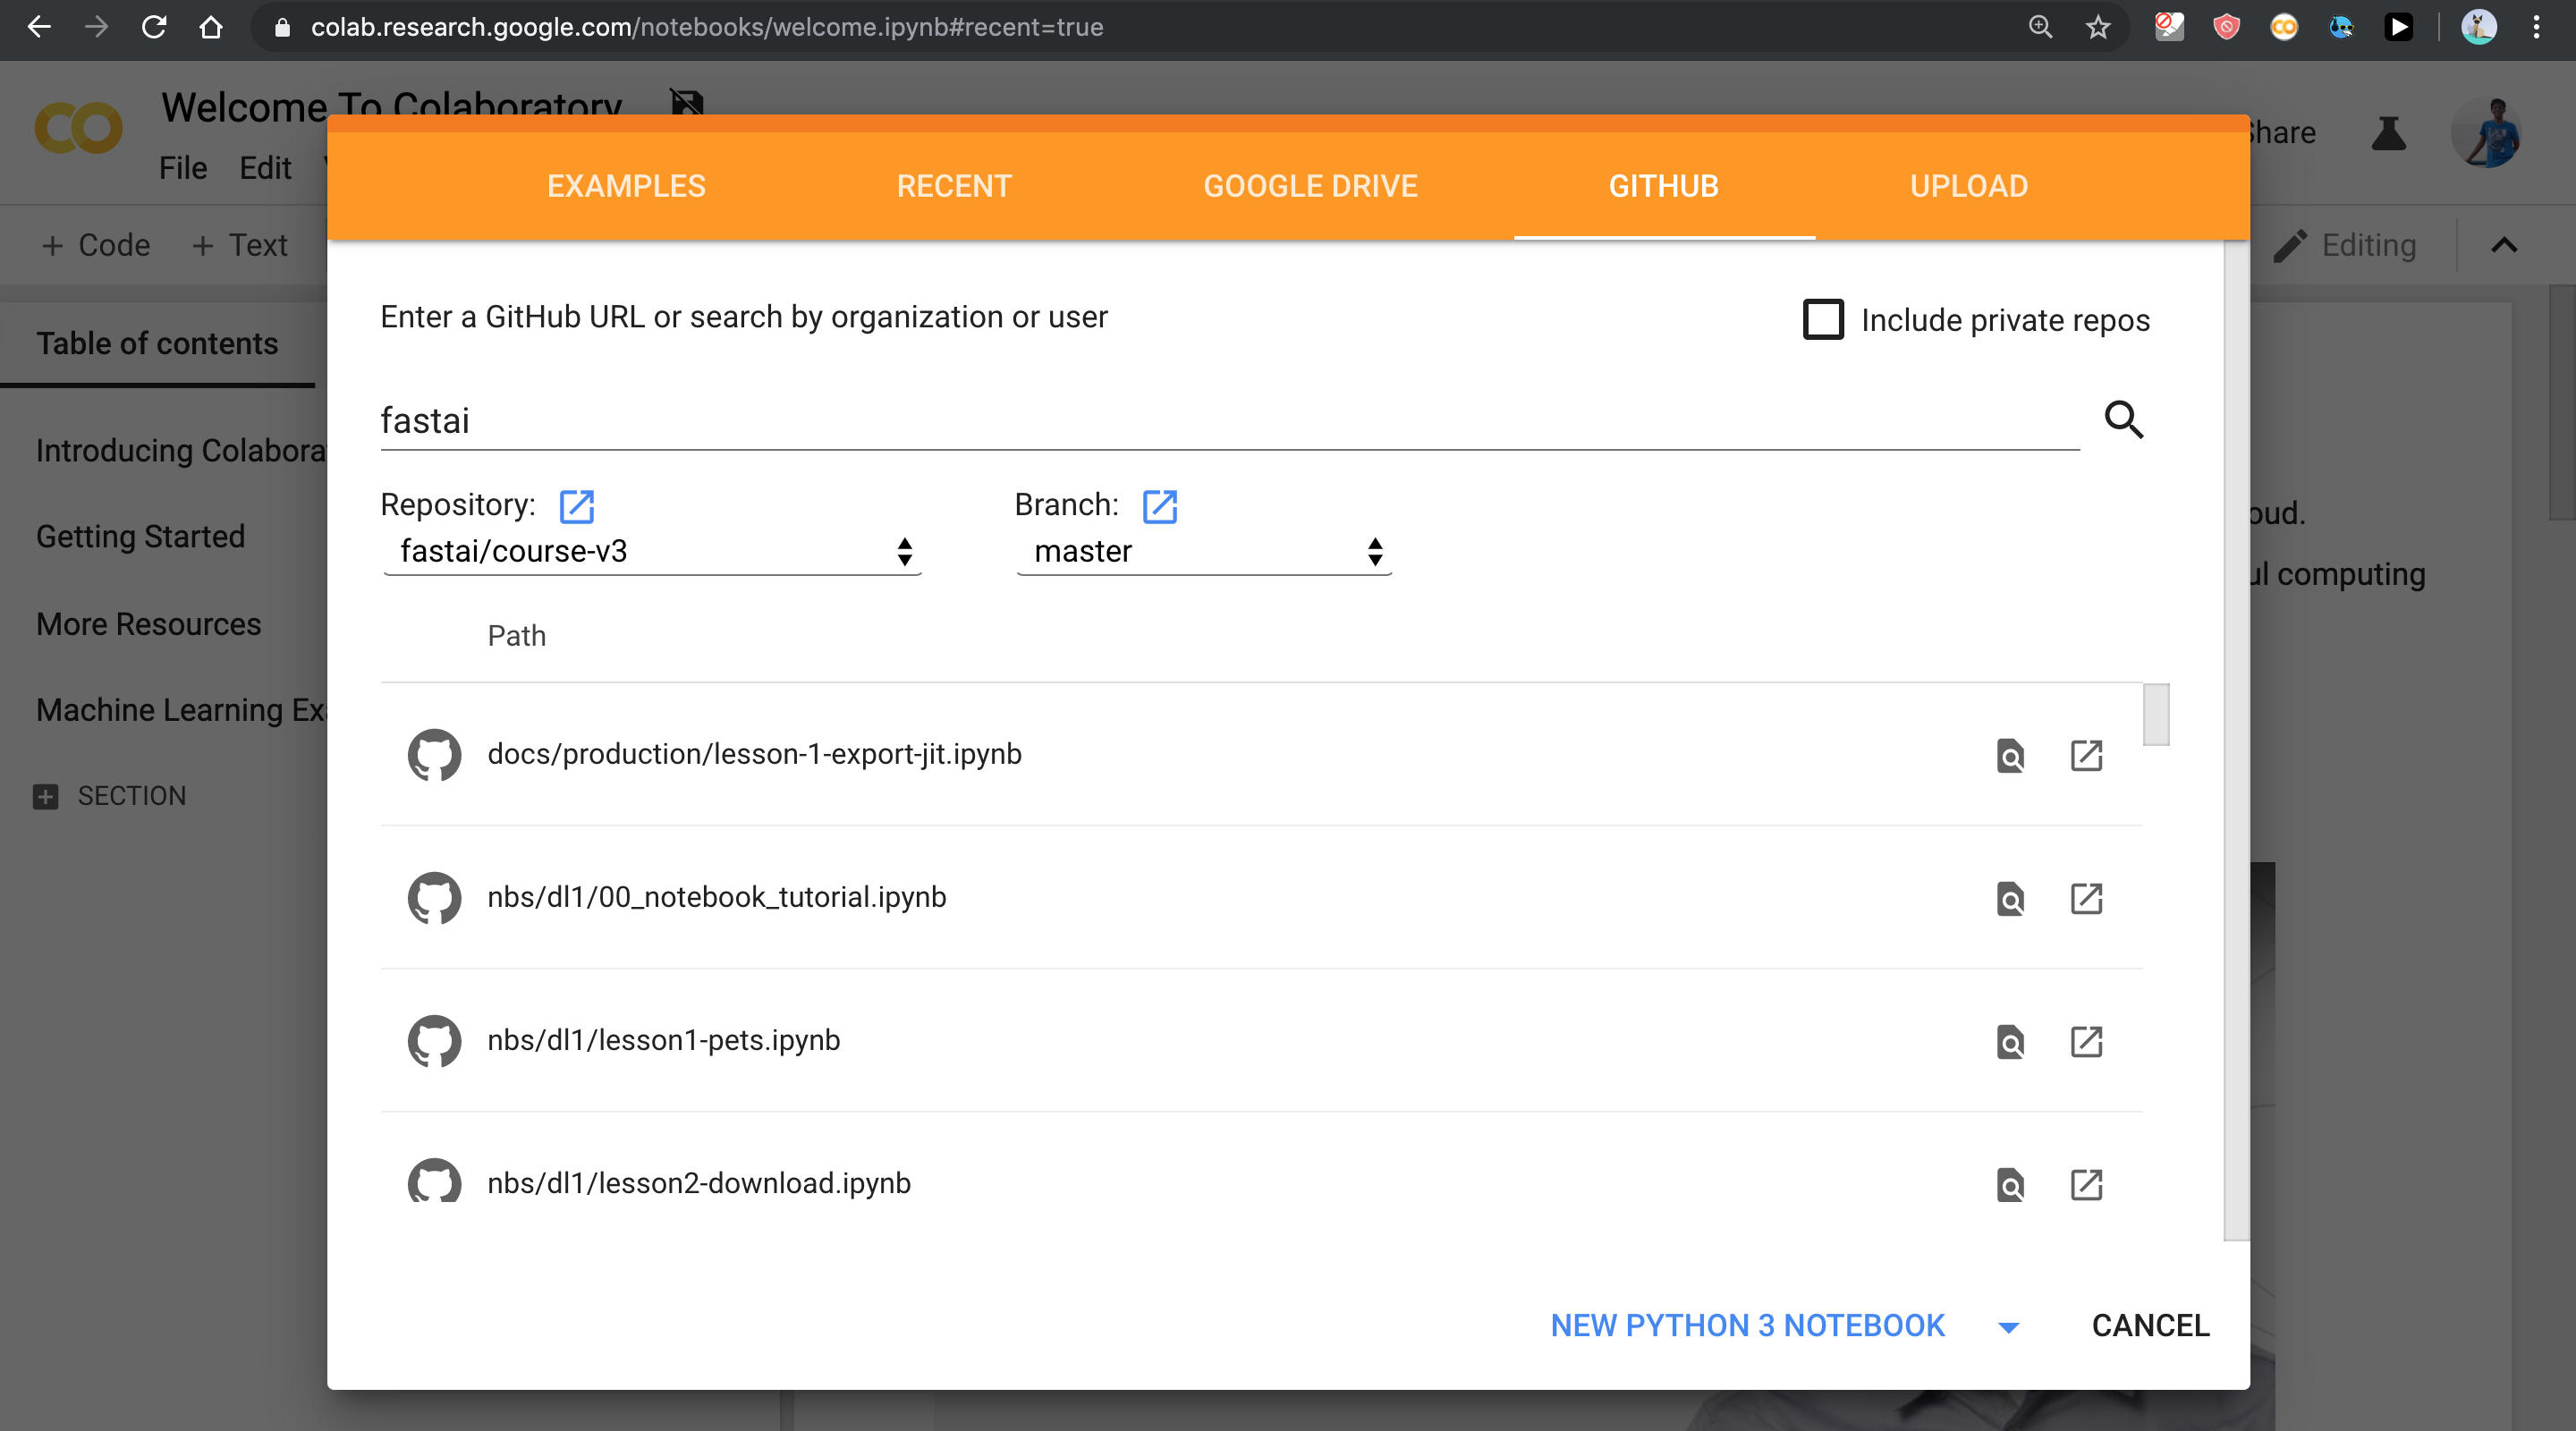
6. Opening Notebooks from Github with ease
To open a notebook from Github. Go to https://colab.research.google.com switch to the Github tab and enter an organization or URL.
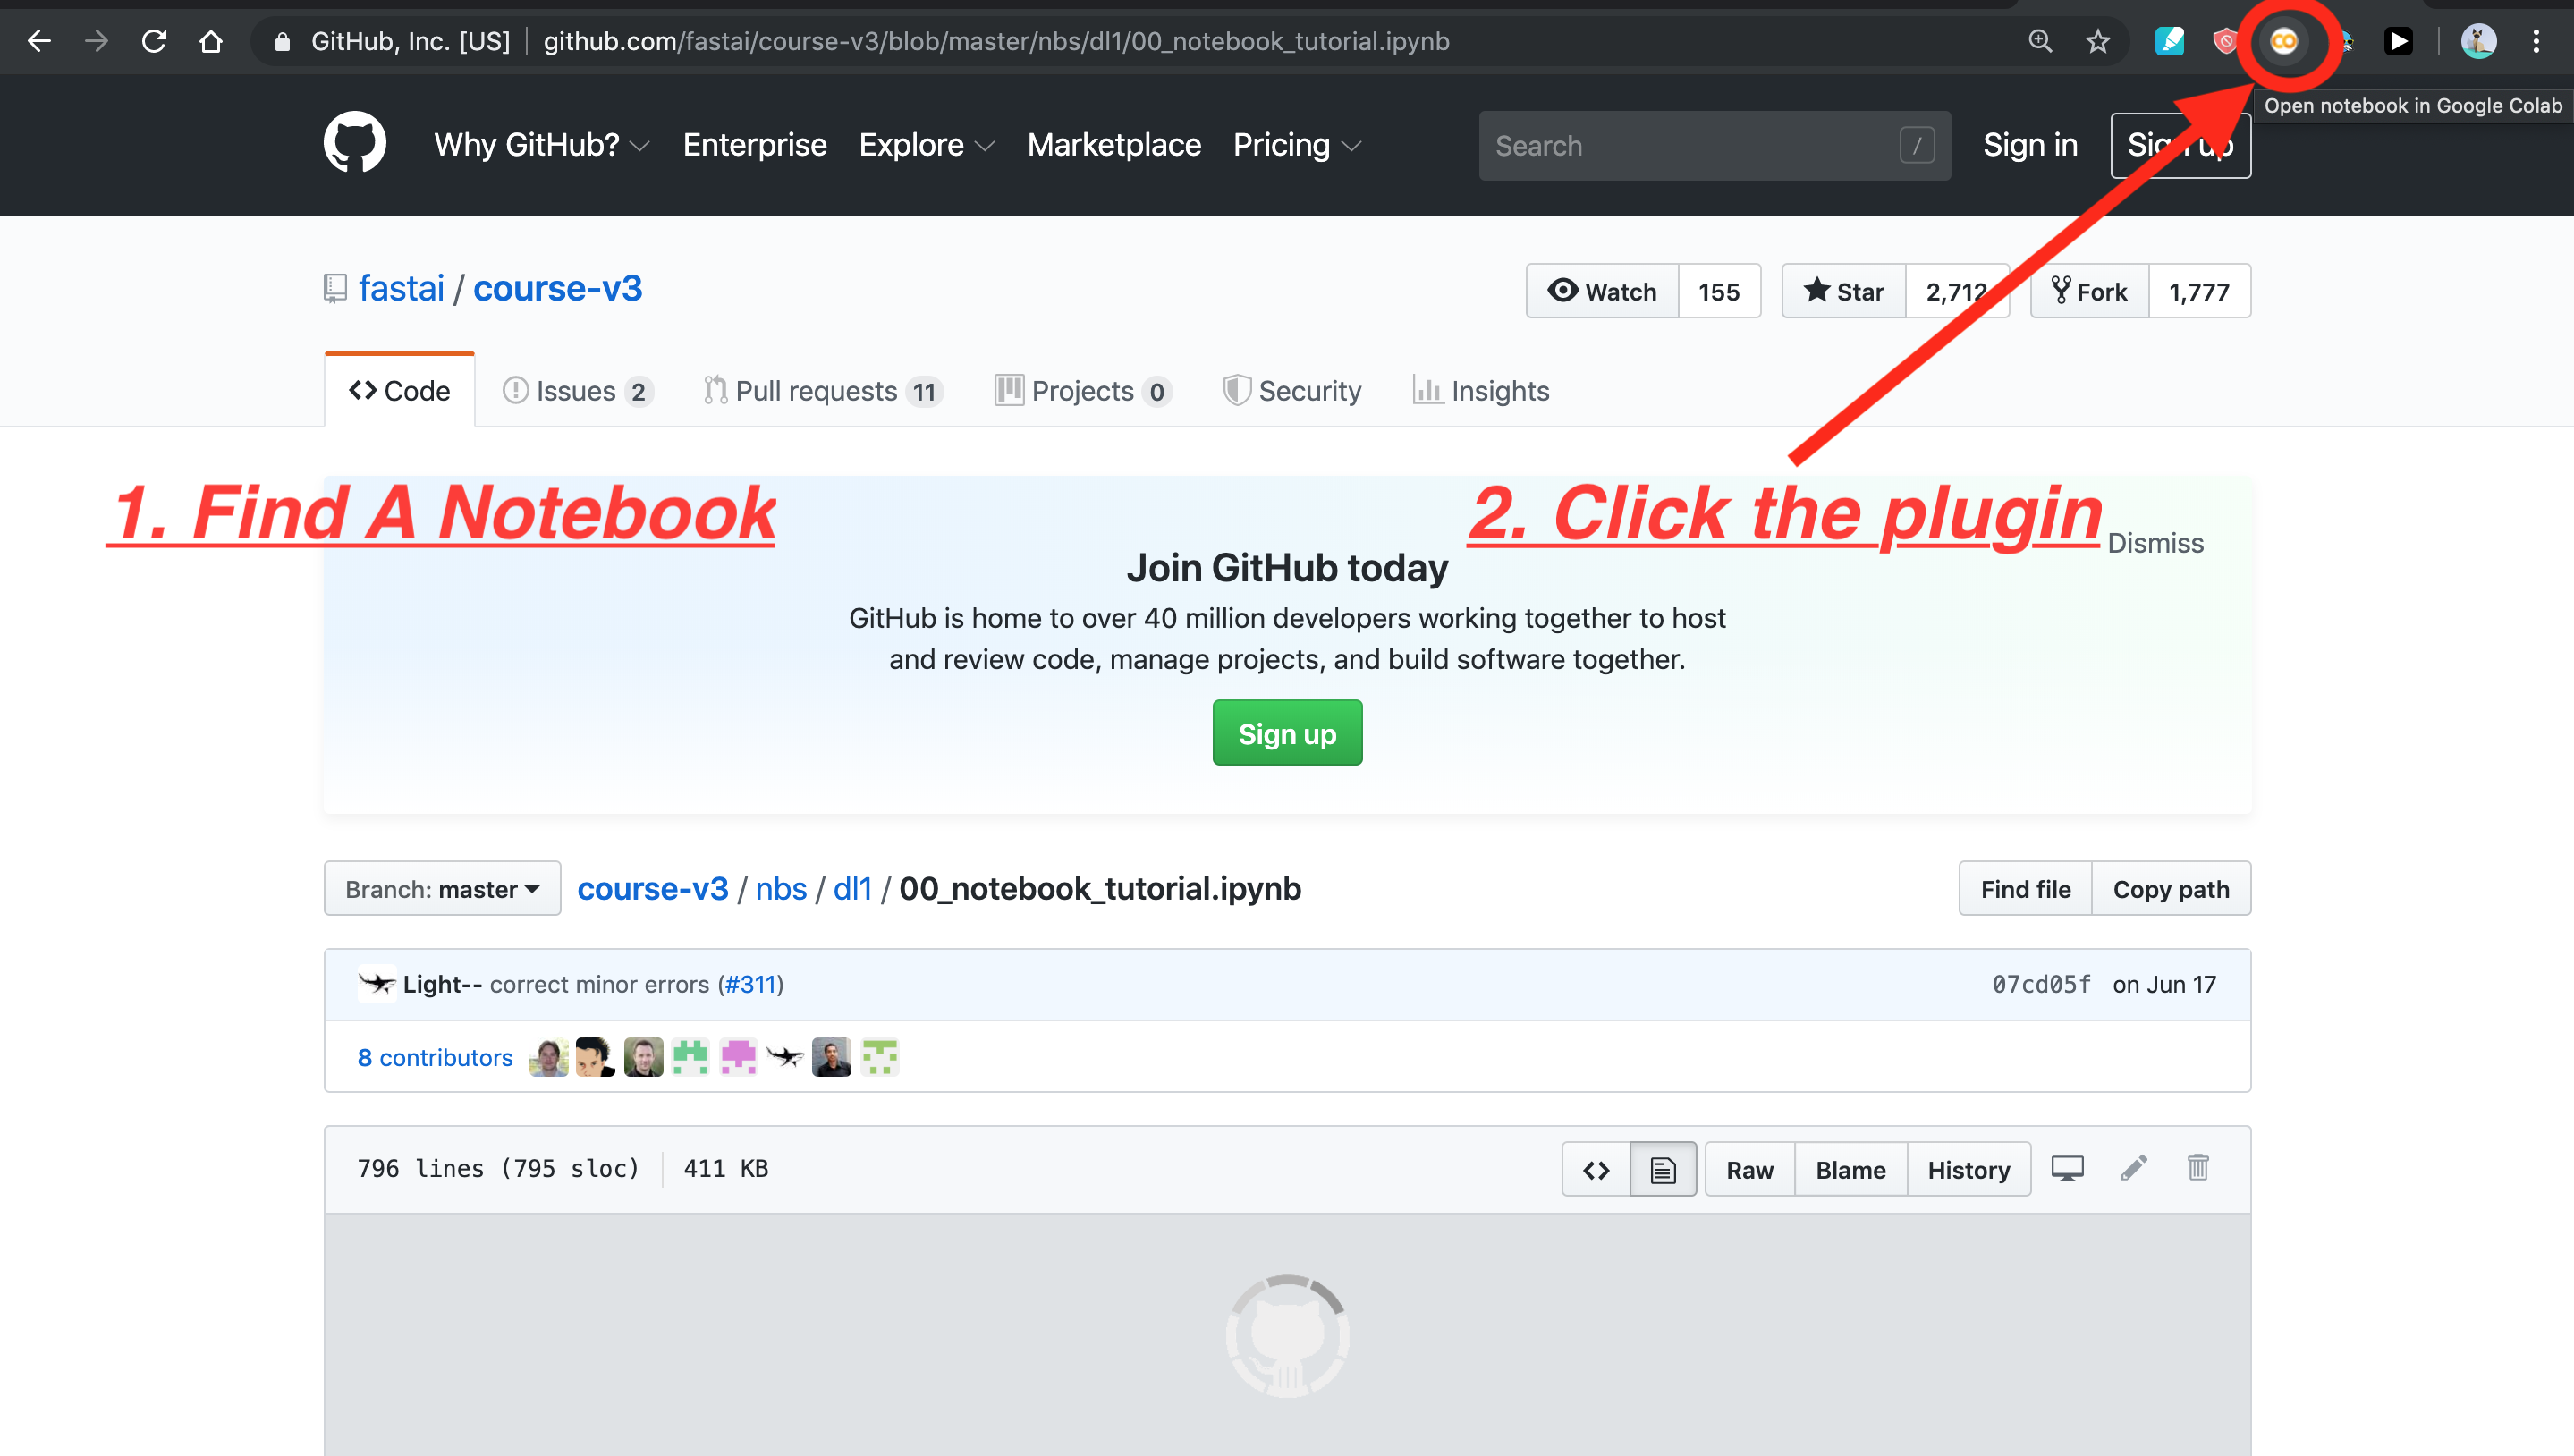
A much easier way is to use “Open in Colab” Extension for Chrome
After installation, whenever you find a Jupyter notebook in Github, click the icon of the plugin and it will open in Colab.
7. Send email when the task is complete
This can be helpful when you want to leave your computer for a long time and want to just get a notification when training is completed.
This is a perfect candidate to apply with Tip #4.
**`import** smtpl`ib

`server **=** smtplib**.**SMTP('smtp.gmail.com', 587)
server**.**starttls()
server**.**login("sender_gmail_here@gmail.com", "your_password_here")`

`msg **=** "COLAB WORK FINISH ALERT!"
server**.**sendmail("sender_gmail_here@gmail.com", "receiver_gmail_here@gmail.com", msg)
server**.**quit()`
Source: Colab Tricks by Rohit Midha
8.️ HyperDash
This one is more of an ML/DL DevOps tips which can work anywhere, even in other Jupyter notebook envs. Hyperdash | Machine Learning Monitoring
$ hyperdash run -n "MNIST" python mnist.py
Iter 1280, Loss= 1.576423, Acc= 0.51562
Iter 2560, Loss= 1.450179, Acc= 0.53906
Iter 3840, Loss= 1.160066, Acc= 0.64844
Iter 5120, Loss= 0.898589, Acc= 0.73438
Iter 6400, Loss= 0.685712, Acc= 0.75781
Iter 7680, Loss= 1.085666, Acc= 0.64844
$ hyperdash run -n "MNIST RNN" python mnist.py
Iter 1280, Loss= 1.576423, Accuracy= 0.51562
Iter 2560, Loss= 1.450179, Accuracy= 0.53906
Iter 3840, Loss= 1.160066, Accuracy= 0.64844
Iter 5120, Loss= 0.898589, Accuracy= 0.73438
Iter 6400, Loss= 0.685712, Accuracy= 0.75781
Iter 7680, Loss= 1.085666, Accuracy= 0.64844HyperDash allows you to monitor your model training or anything that is printed via your phone. It supports both iOS and Android and is super simple to get setup.
Installation Step:
- Install HyperDash on your phone
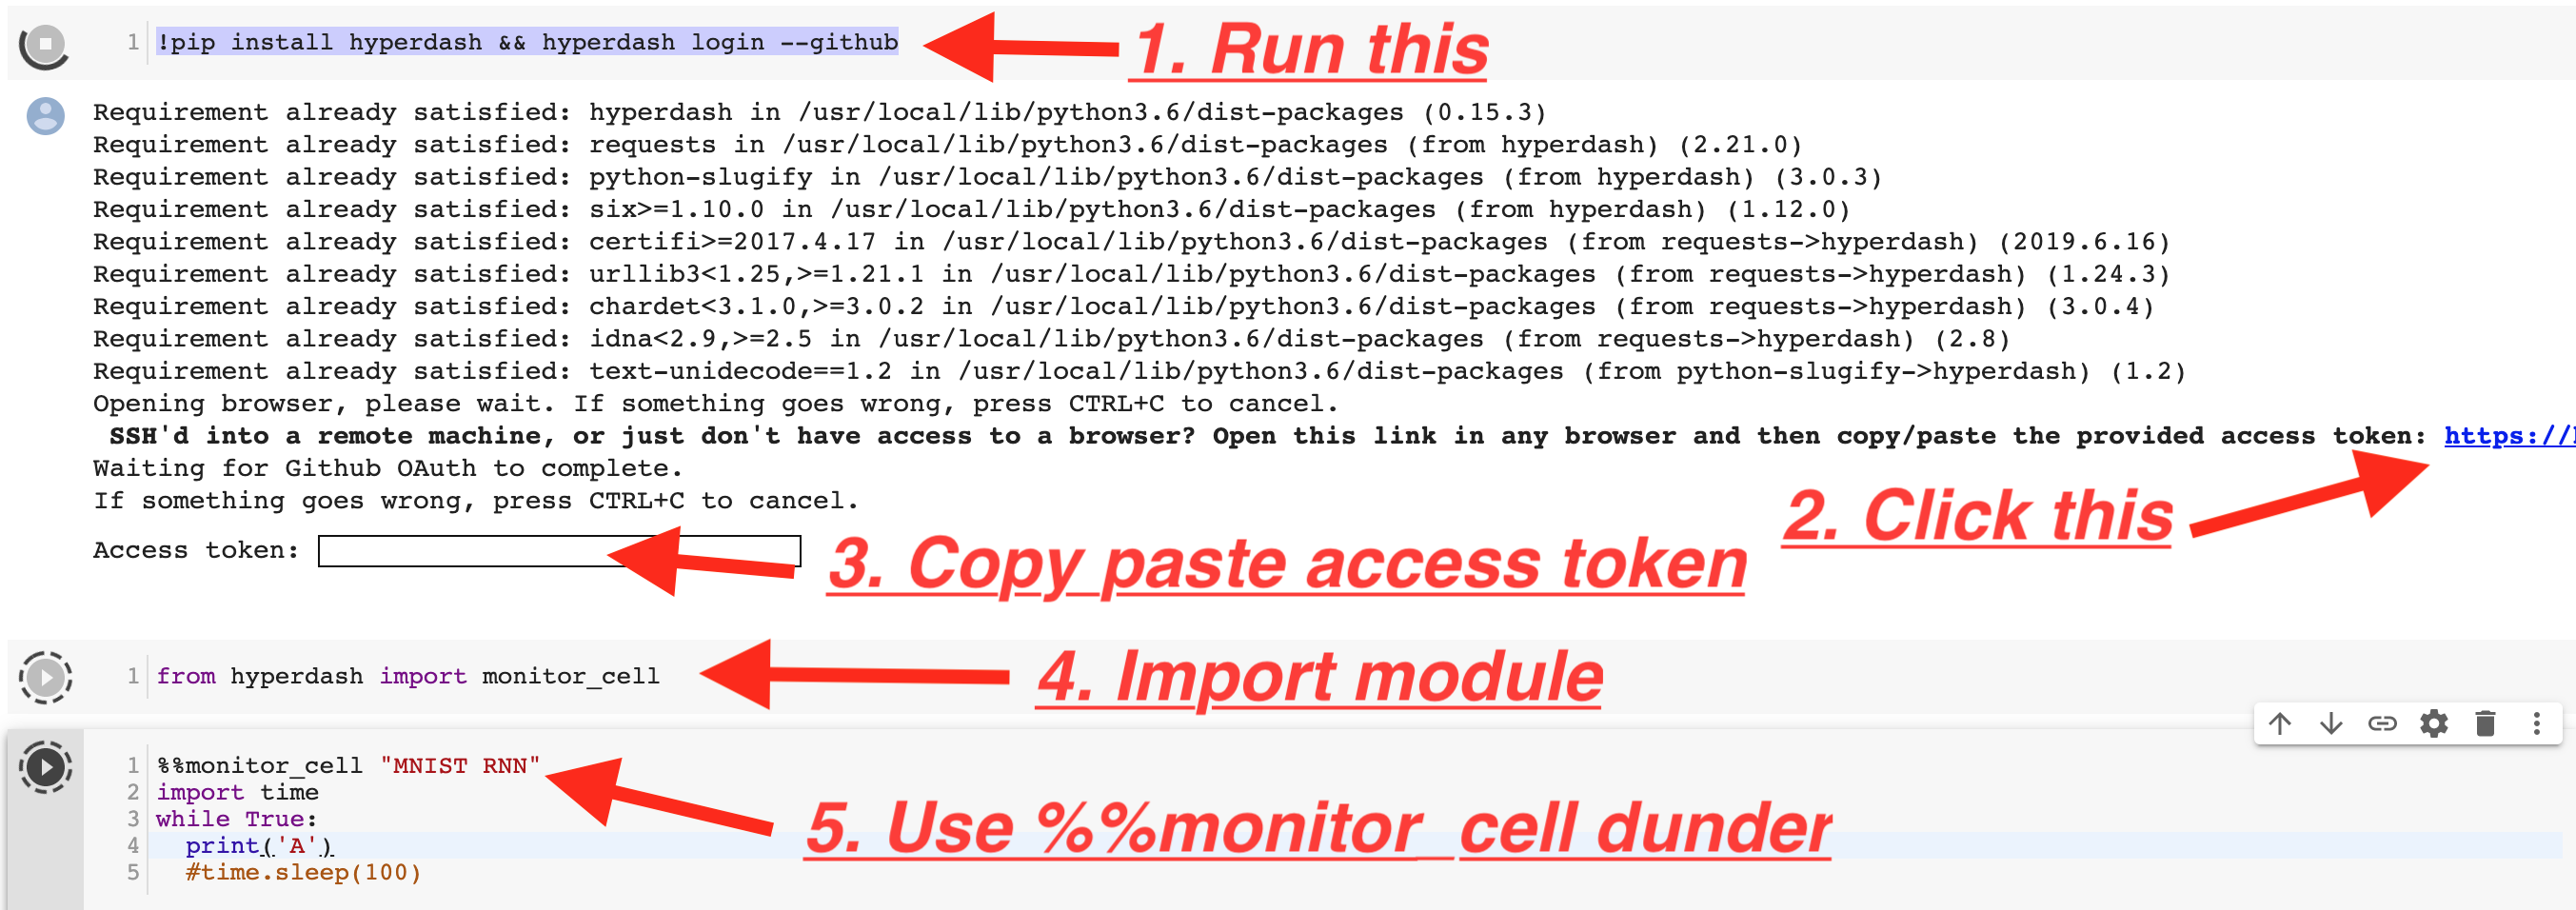
- Go to your Jupyter notebook and run the below cell
I used GitHub login so I added -github in the end
pip install hyperdash && hyperdash login — github- Import module
from hyperdash import monitor_cell
- Use this magic in the cell you want to monitor. Which for most will be the training loop.
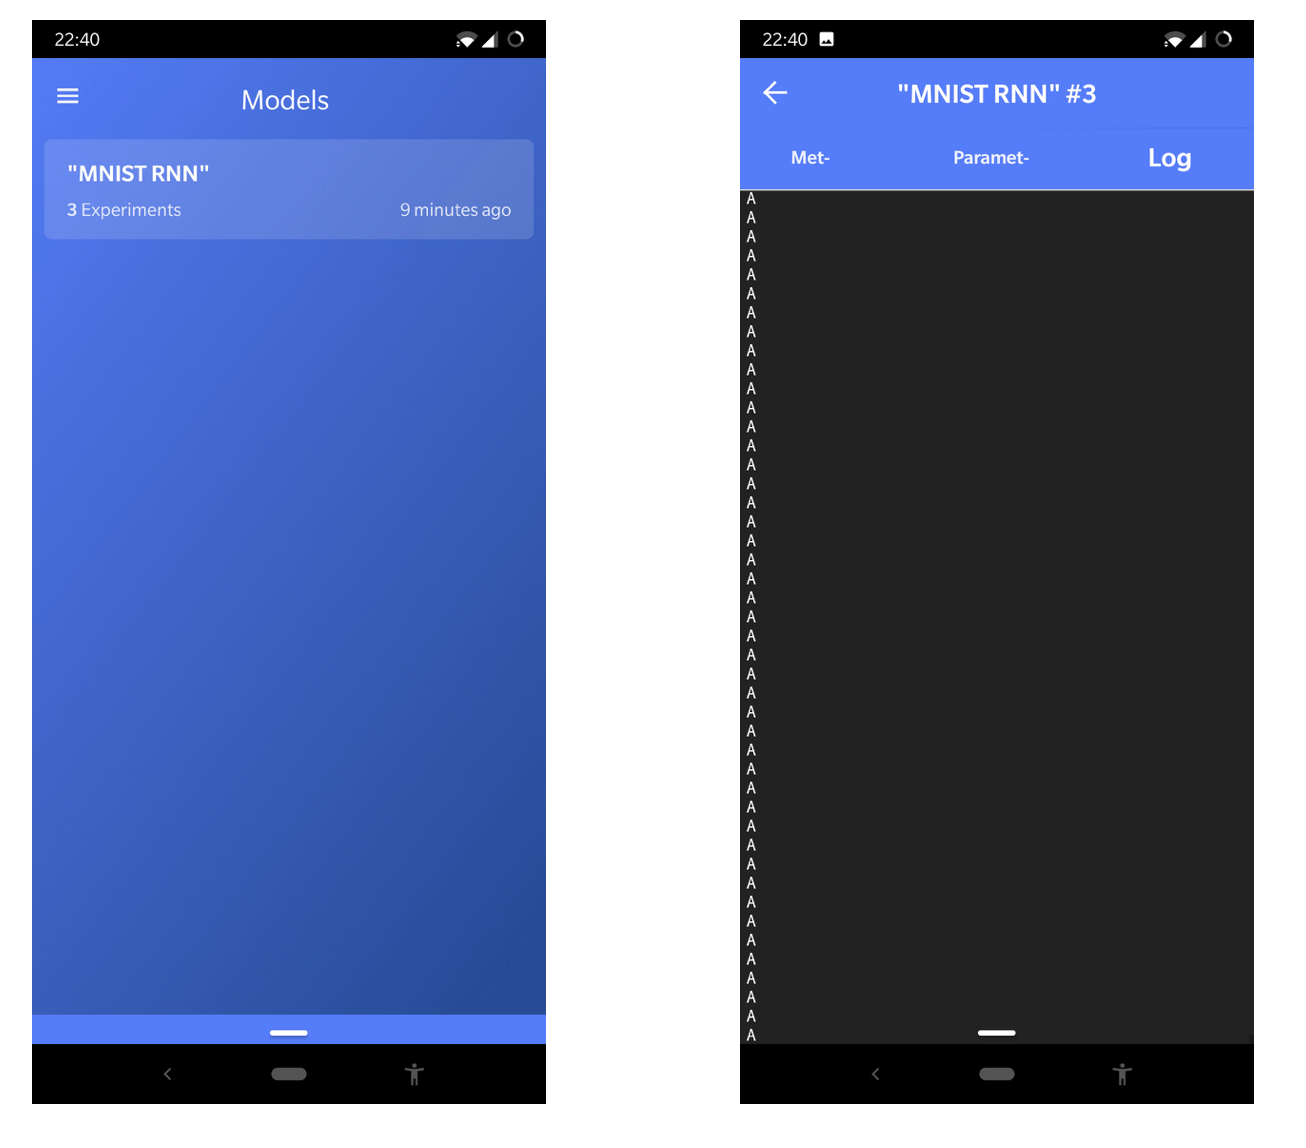
%%monitor_cell “model/experiment name”In the app, you can see something like this. While I have included this as a tip, it is not something I have used. Because I have never trained for a very long duration.
As per HyperDash website, it also allows detection of the status of your training and can notify when your training completes, fails, crashes or gets disconnected.
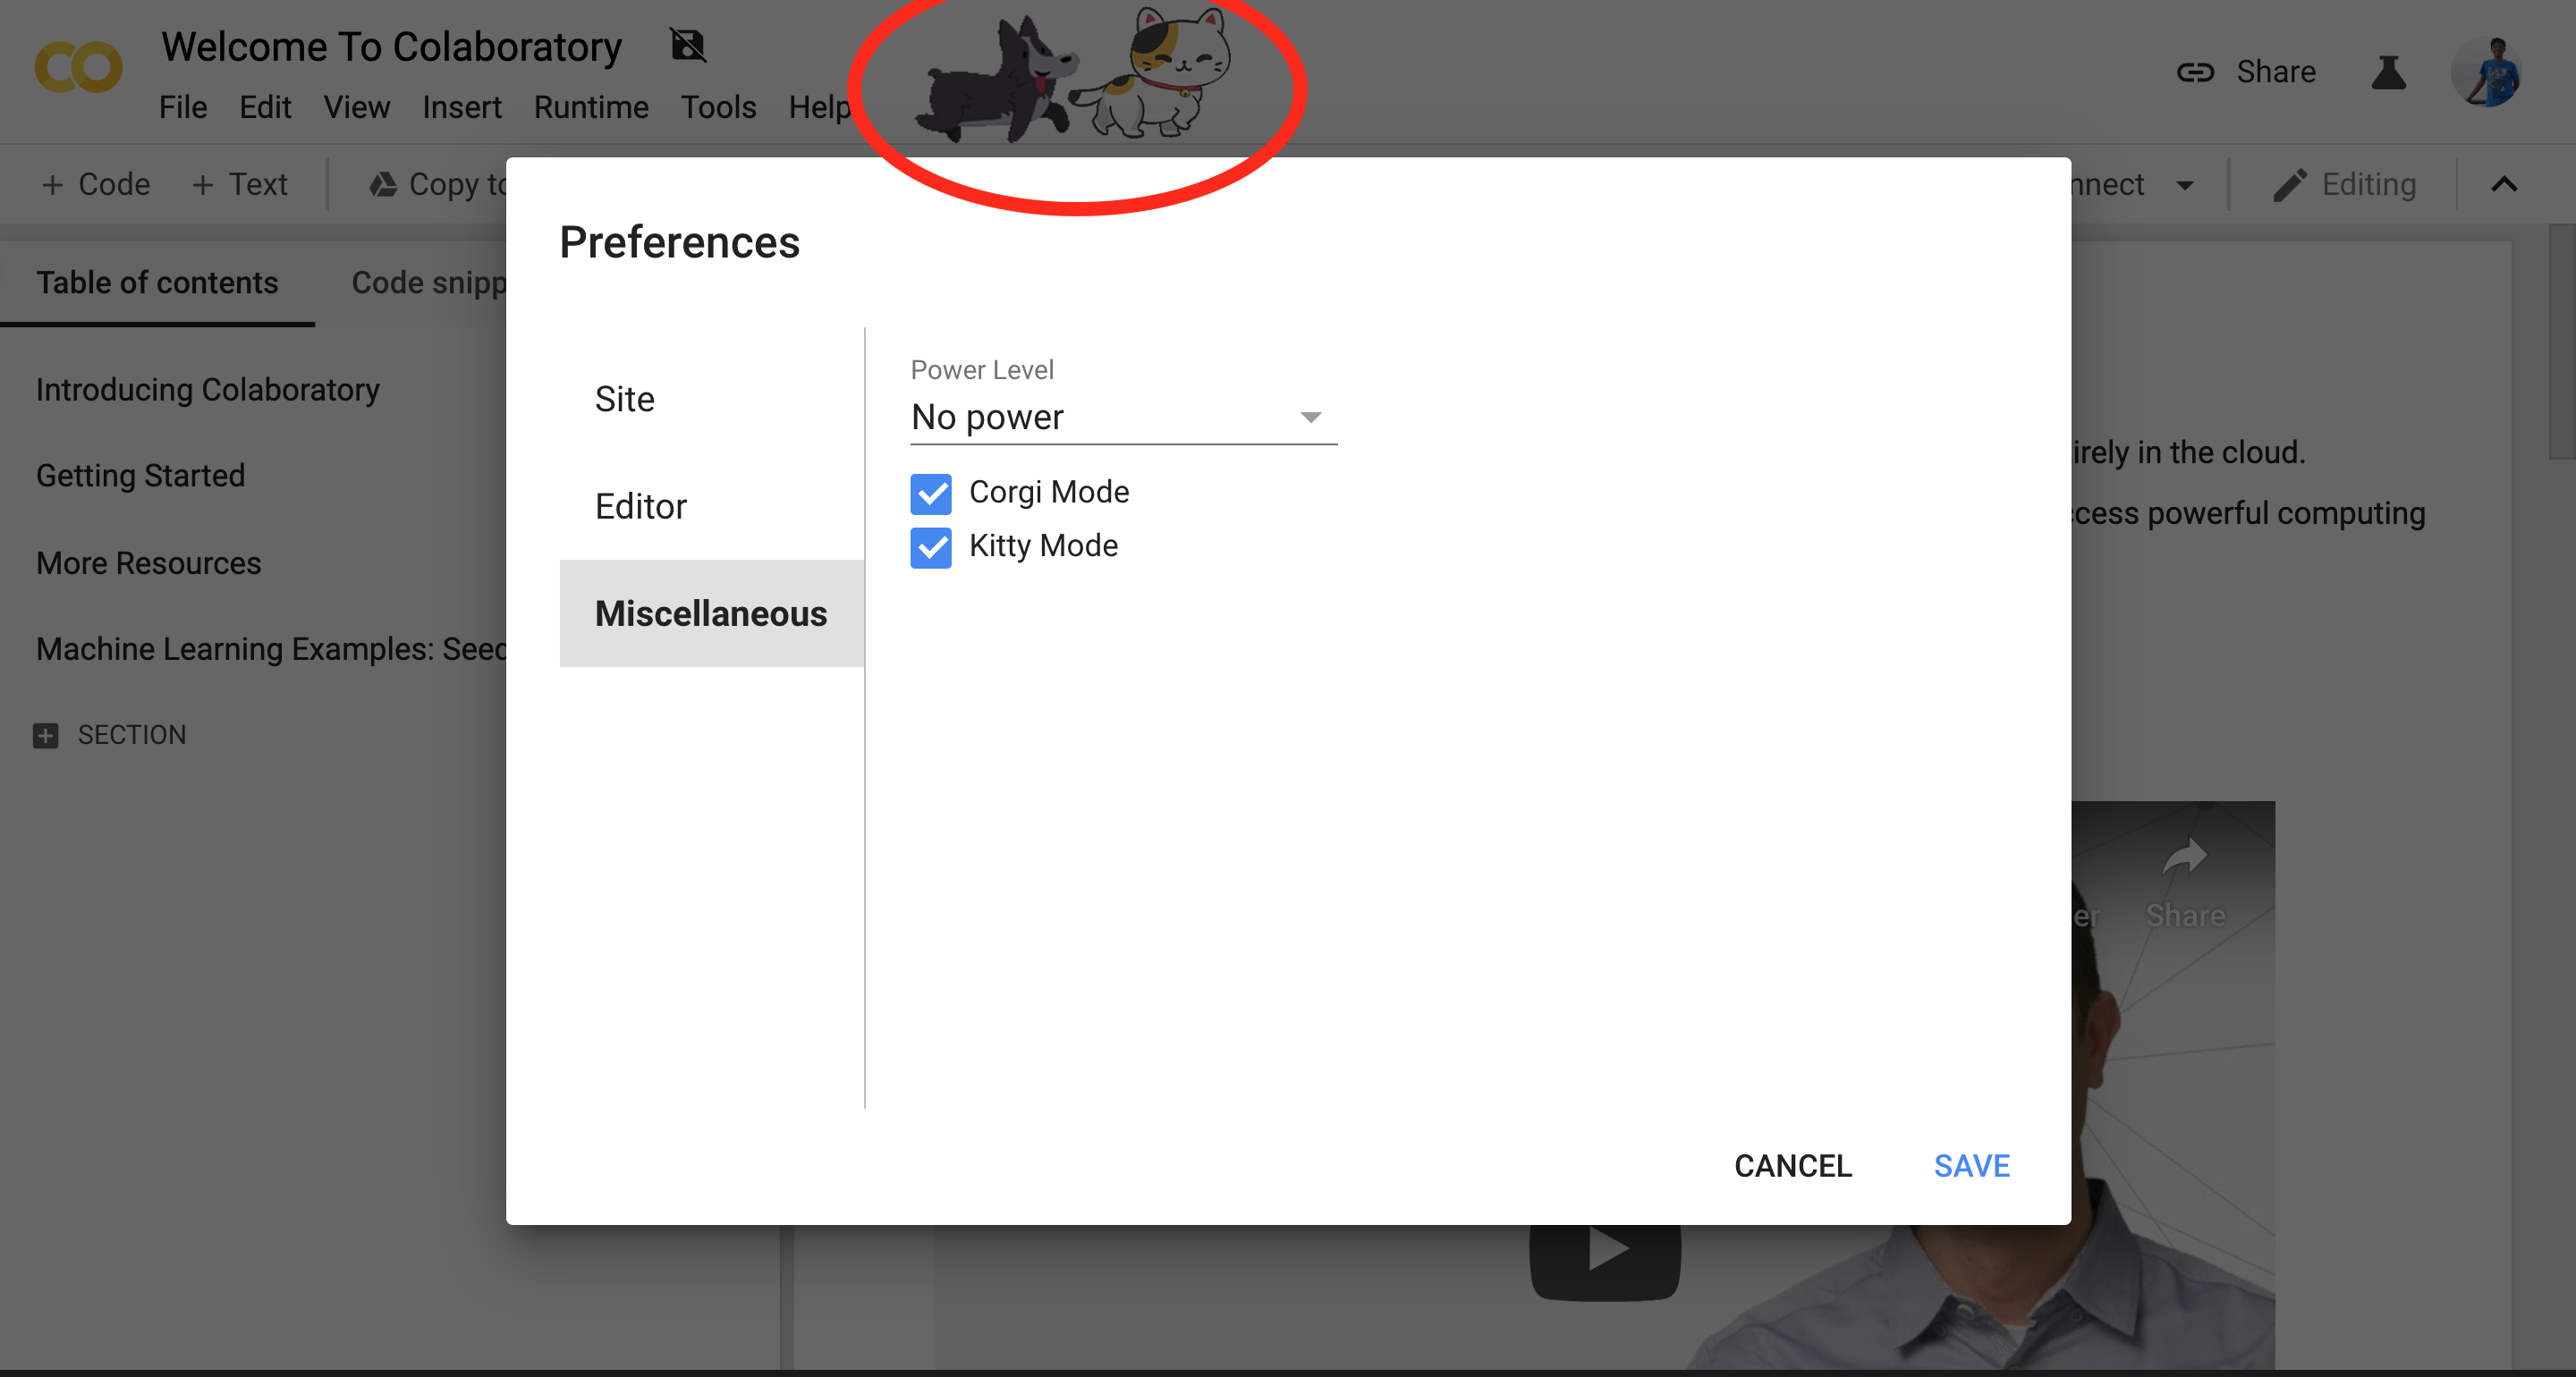
9. 10. — Random Filler Tips: Dark Mode and Corgi/Kitti Mode
This is kind of a filler tip. (Just because I wanted to round off to 10 tips 😜).
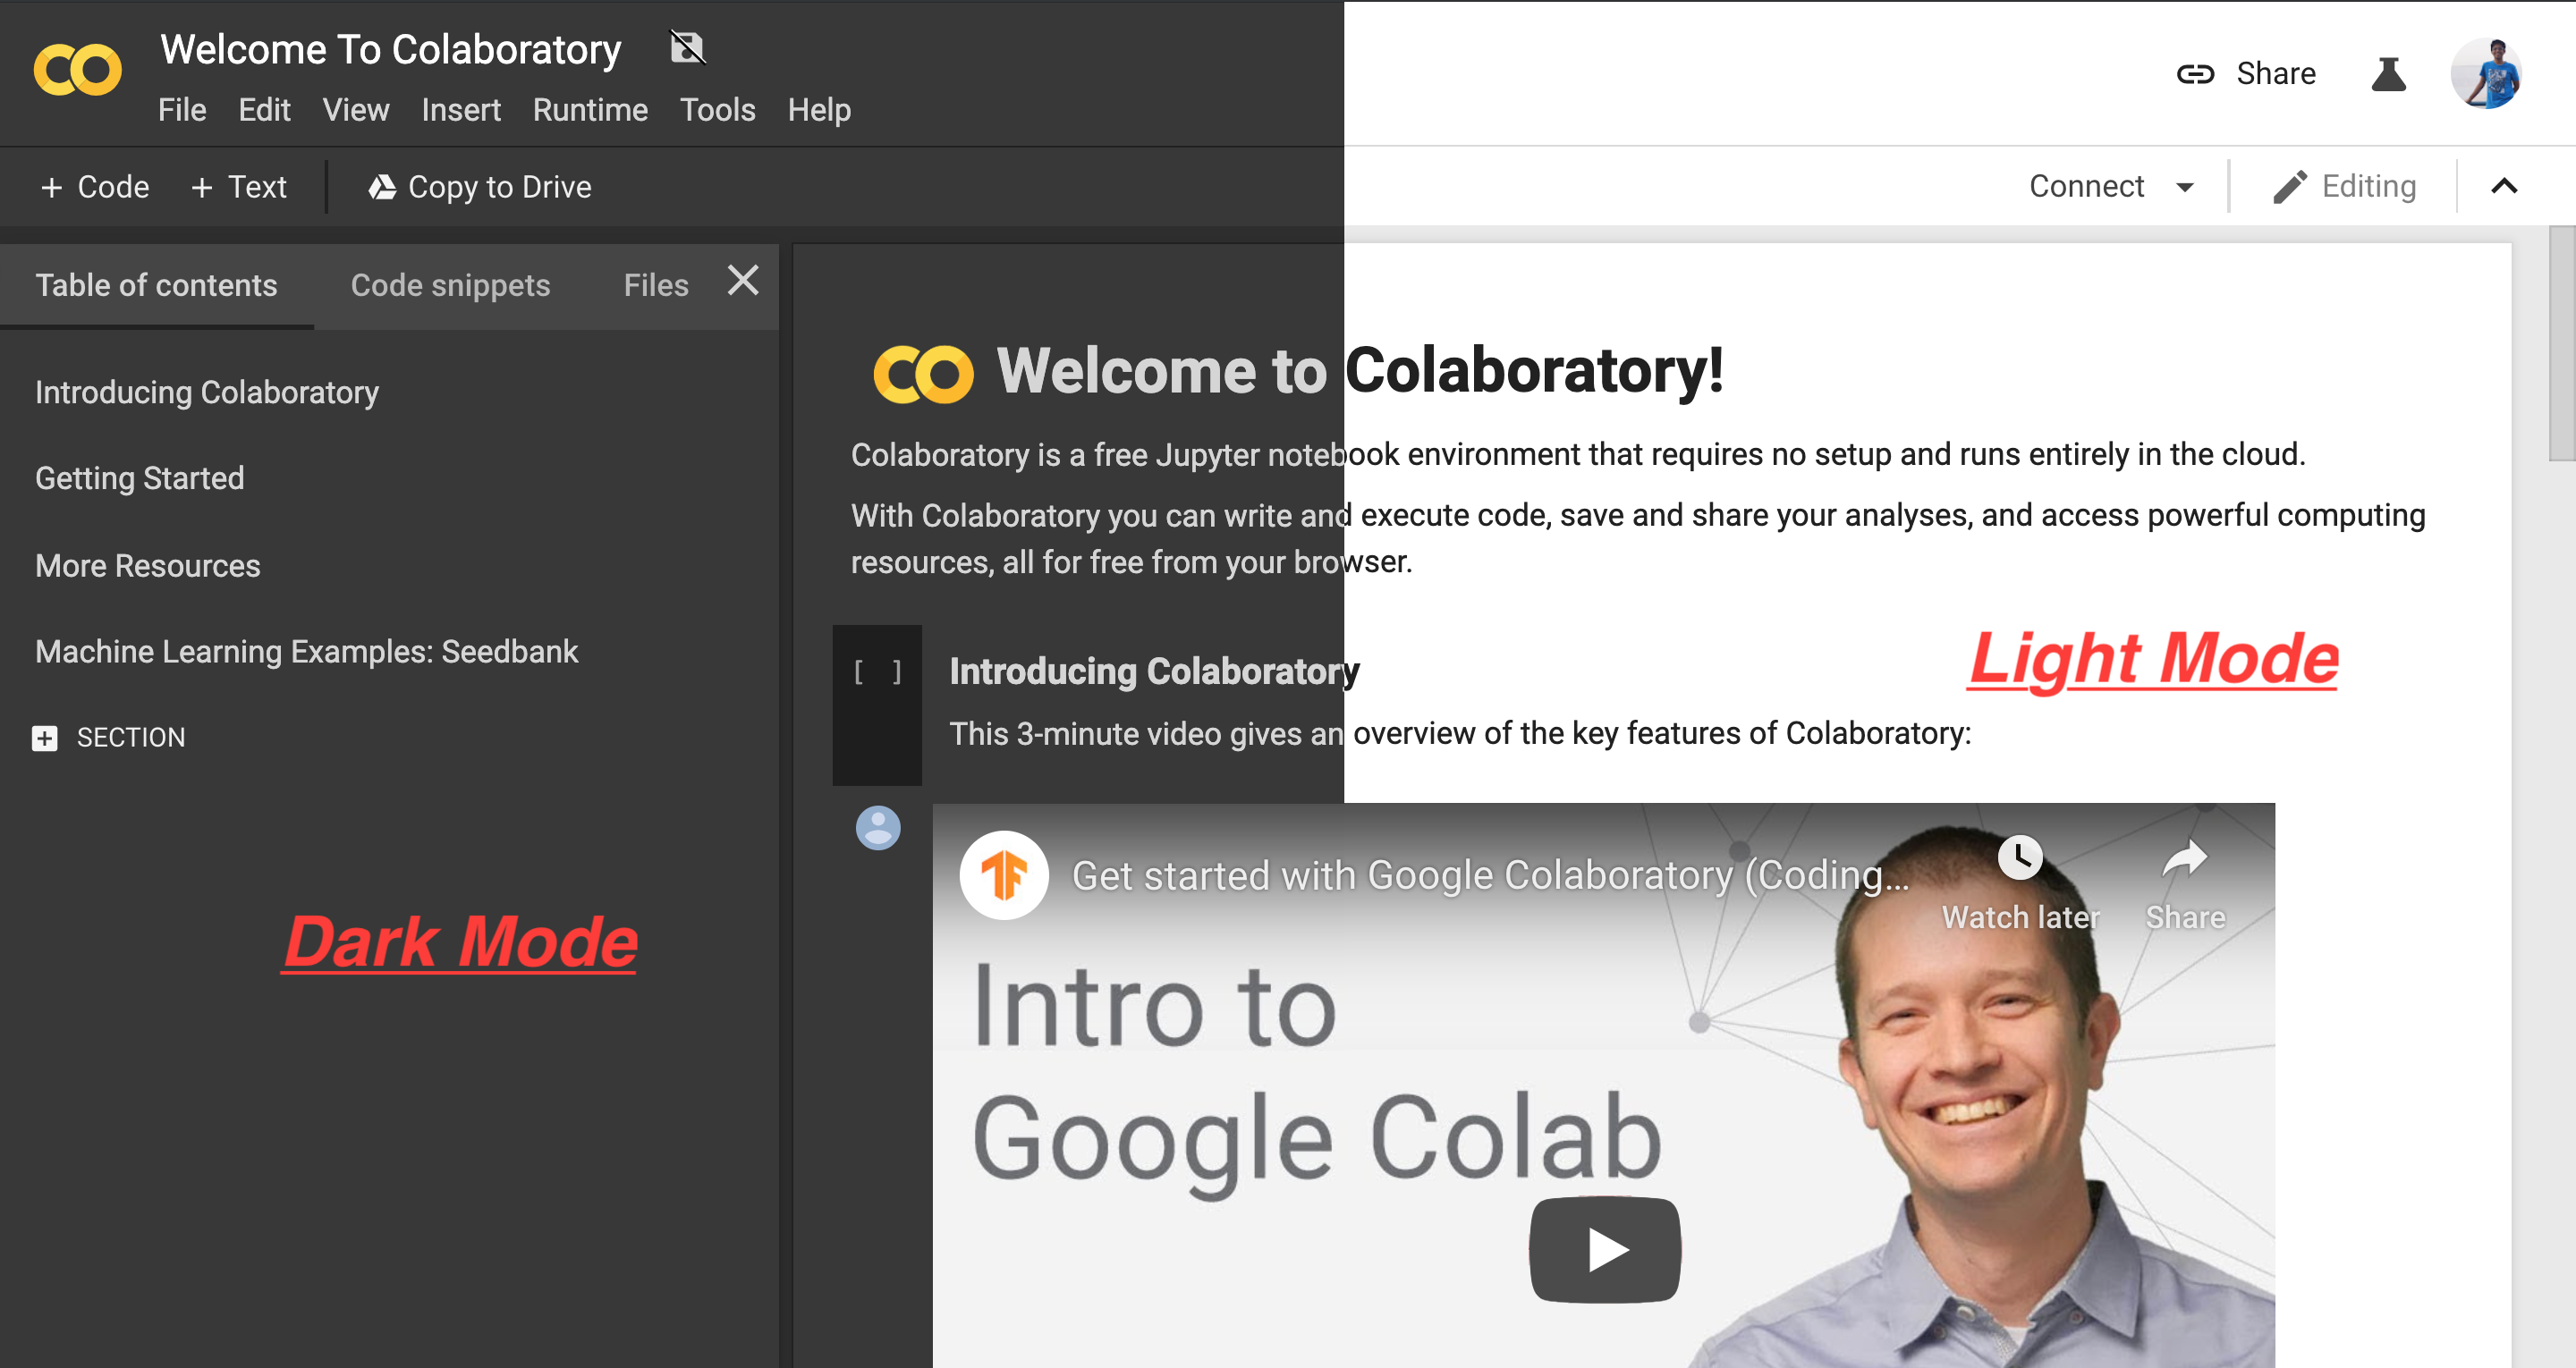
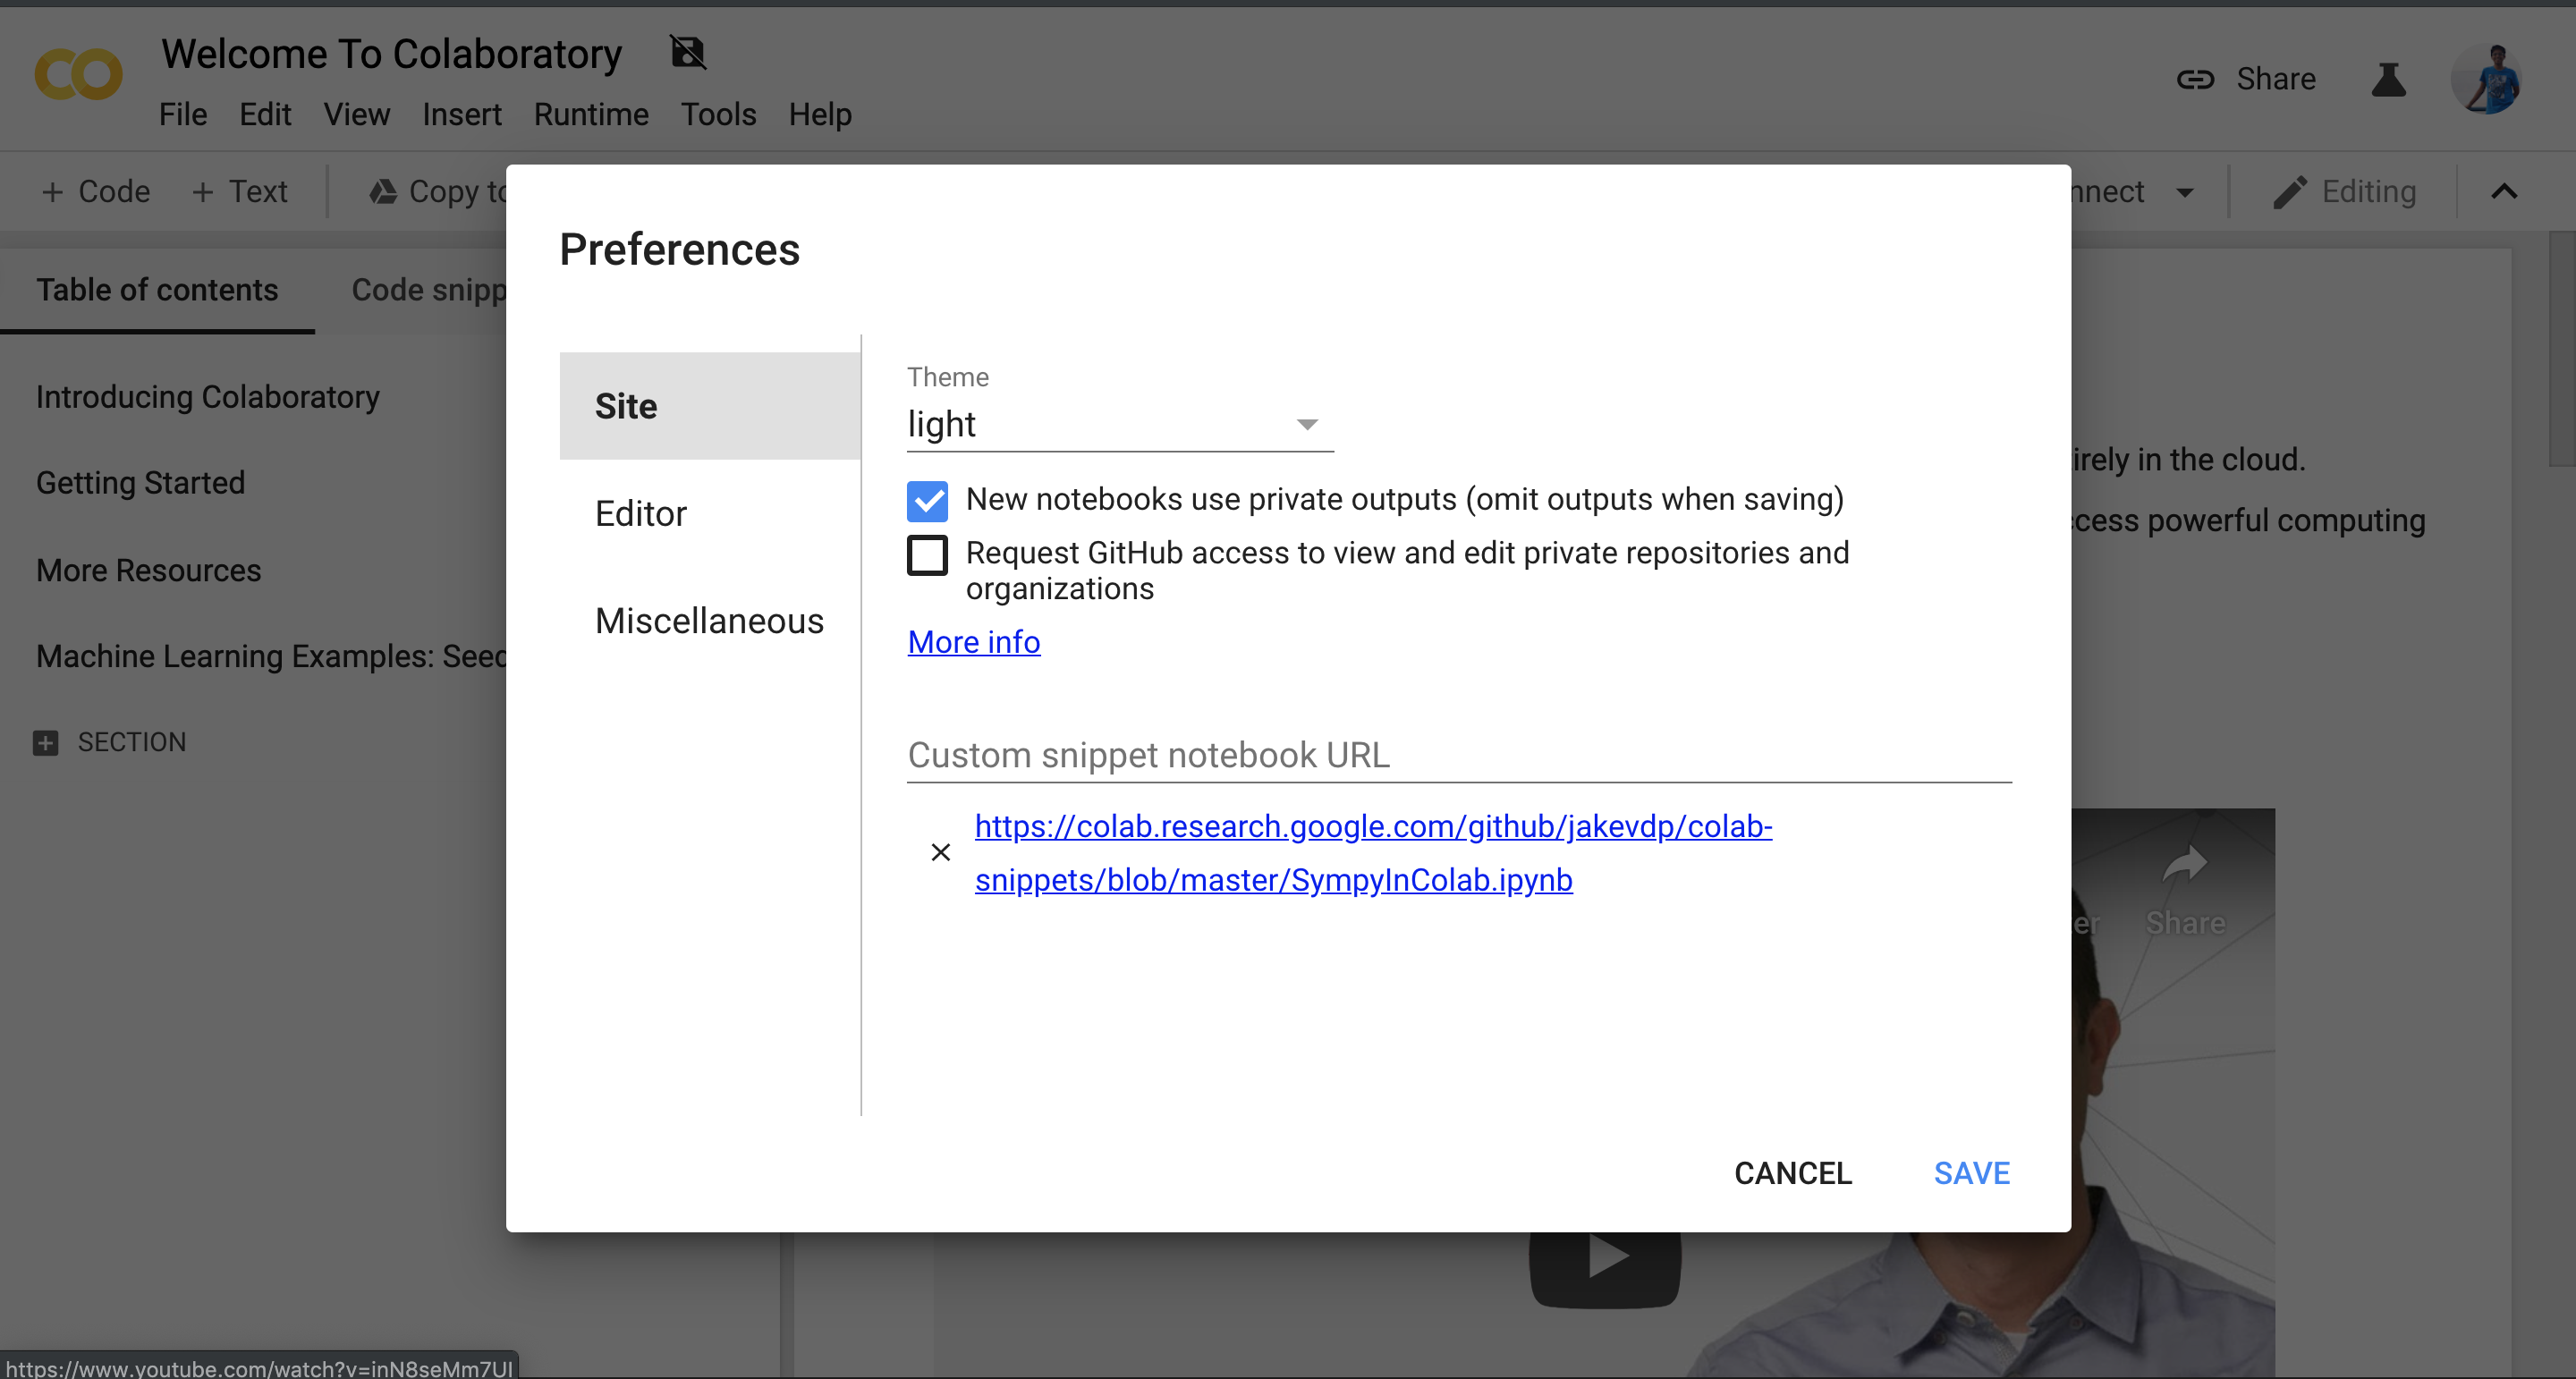
Go into Tools -> Preferences -> Theme -> Select dark.
While the dark mode is cool. I prefer using a light theme.
There is also a Corgi and Kitty mode under Miscellaneous which will add animated Corgis and Kitties in the header.
Other useful tips:
-
Colab Tricks by Rohit Midha
-
8 Tips For Google Colab Notebooks To Take Advantage Of Their Free-of-charge 12GB-RAM GPU.
Previous: Easy Jupyter Notebook Tips
Next: How to Download Dataset from Kaggle
I respond to all my comments. ありがとう